PowerSchool SIS Synchronization Setup
The following instructions will set up an automatic and secure synchronization of student information, teacher information, courses, classes and class rosters from your PowerSchool system to the EdHub system. Once this setup is completed this information will automatically synchronize every evening and on demand when required.
The first step is to request a username and password to the Silverback SFTP (secure FTP) synchronization server.
Once you have a Silverback SFTP username and password, please follow the instructions below.
You will need to log into your PowerSchool Admin area to complete this setup.
Create Managed Connection
This step will create a secure connection to the Silverback synchronization server and is required for the steps that follow.
1. Click System in the left menu under the Setup section.
2. Scroll down and click on System Settings in the Server section.
3. Click on Plugin Management Configuration.
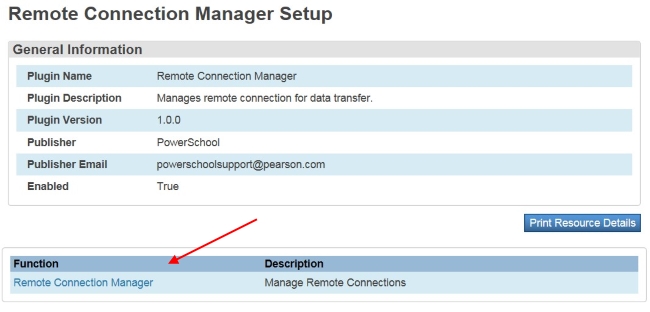
4. Enable the Remote Connection Manager.

5. Click on Remote Connection Manager.
6. Click on Remote Connection Manager once again.
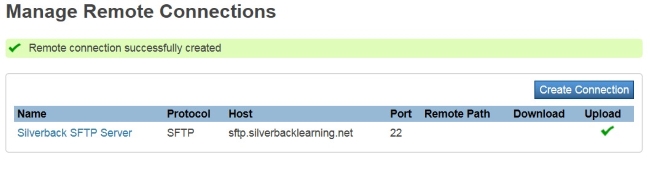
7. Click on Create Connection.
8. Edit Remote Connection
Fill out the fields as shown below. (Do not click Submit yet)

b. Click on the Test Connection button and then click on the "Yes, Accept the Host Key" button. This is normal behavior and part of the TOFU (Trust on first use) security model as employed by SSH. See e.g. https://en.wikipedia.org/wiki/Trust_on_first_use

9. Click submit and you should see a screen similar to the following screenshot.
Set up Autosend
We now need to tell PowerSchool what files to send. We will need to set up 5 Autosend configurations (one for each of Courses, Sections, Student Schedules, Students and Teachers). These 5 Autosend configurations will need to be set up in each school.
Each configuration is very similar to the "Name" field, the "Data to Send" field, the "Path" field and the "Fields to Export" field.
The following table describes the inputs for those fields for the 5 exports.
Hint: You can copy and paste the Fields from the above table into the "Fields to export" input box and save yourself a lot of typing.
OK. Here we go!
1. Choose your first school by clicking on the School link in the upper right area of your screen
2. Click System in the left menu under the Setup section.
3. Click on the Auto Send link in the Data Management section.
4. Click on the New button.
5. Fill in the following fields.
6. Click Submit to save this record.
7. Repeat steps 4-6 for each Autosend configuration. (EdHub_Courses, EdHub_Sections, EdHub_Student_Roster, EdHub_Students, EdHub_Teachers)
8. Test the exports by clicking on Run Now.
Duplicate these Autosend Configurations for all Schools
You have now completed the set up for one school. Now we have to duplicate this setup to all of your schools and modify the "Path" field in each and every Autosend record for each school. Remember, once this is done it is an automated process!
1. Edit each of the Autosend records that you just created to duplicate to all schools. Check the "Duplicate this Auto Send record to all schools on this sever" and click Submit.

2. Important! Change to each schools Autosend records one at a time and change the path to reflect that schools school number and school name.
3. Execute each Autosend record to ensure that everything is working.
4. Notify Silverback support that your Autosend configuration is complete. The implementation team will still need to complete some setup on their end.
Hope this helps!
Related Articles
SMS Students Setup
From the Mileposts Administration page click on SMS Setup under Mileposts Setup Then click on Students Student: A table of all students in the Mileposts system Filter Last Name First Name School Starts with: Type at least 3 characters to filter ...SMS Setup (Complete Guide)
District Setup Districts Add new District/Edit General Tab Name: District Name Current School Year Public Key Sync Tab Sync Students: Checked =True True/Yes False/No Sync Enrollment: Checked =True True/Yes False/No Sync Classes: Checked =True ...Student Search and Student e-file
Student Search & Student e-file Student Search The Student Search feature allows staff to quickly access a student's e-file for any students within their scope. The student search link is located in the gray toolbar on the far right side of the ...Manage Student Program Participation
Summary Tracking Program Participation A Mileposts program can be configured to be Summary Tracking for participation. This means that a student's participation in the program is determined by the district's student information system (SIS) and is ...Configure Schools and Moderators Notification System
Mileposts Notification System The Mileposts Notification System (MNS) generates real-time alerts specific to student behavior and other events, keeping teachers and administrators informed and up-to-date on student issues. The MNS is opt-in, and must ...