Job Manager (Complete Guide)
Jobs are tasks that run automatically, nightly. These jobs include but are not limited to Mileposts Nightly Maintenance, Purges, Student Importers per School and Dynamic List updates. Milepost kicks these jobs off but they are run in the server and database where the information resides. For more information about Nightly Sync and Jobs see (Mileposts PowerQuery Configuration and Mileposts Nightly Sync Flow)
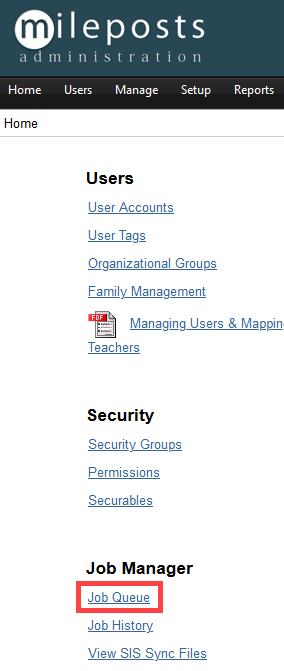
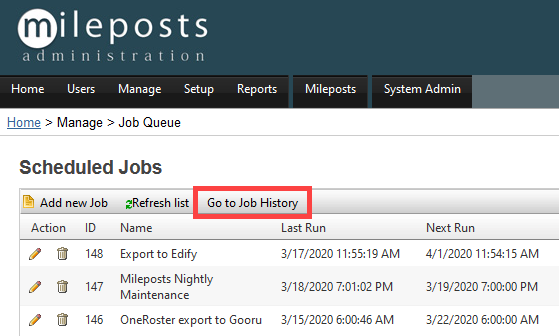
Job Queue
Scheduled Jobs
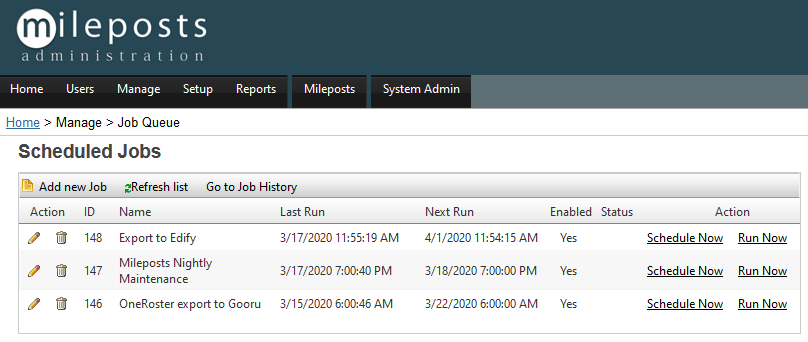
Add new Job
Add additional jobs

General Tab
Name
Name of the job
Job Class
Opens a list of the different Job Classes
Behavior Incidents Importer
Execute Stored Procedure
MIleposts Nightly Maintenance
OneRoster Export
Programs Importer
Purge Job Results
Purge Login History
Staff Importer
Student Importer
Update Dynamic Lists
User
Opens a list of district staff
Job is
Enabled
Disabled
Log Results
On
Off
Interval
Number
Per
Minutes
Hours
Days
Months
Last Run
Displays the last time the job has run. Or is blank if job has never run
Next Run
Type the date and time in the box
Select the date with the calendar selector
Select the time with the time selector
Job Status
Click the checkbox to Reset to Idle Status. This is used if the job gets stuck or hung up
Description
A dialog box to enter a detailed description of the job (optional).

Notifications Tab
Add email addresses to send that person notification of the desired type of notification. Separate multiple emails with a semicolon
Summaries
Warnings
Errors

Parameters Tab
Perameter
SyncSource
InsertThreshold
UpdateThreshold
InactiveThreshold
DeletePossitionThreshold
ImportSpecFile
ImportFileName
ImporterType
Value

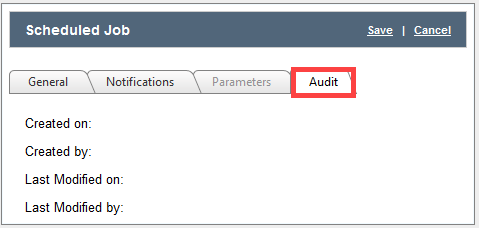
Audit Tab
Audit Information is a basic timeline including the following:
Created on
Created by
Modified on
Modified by
Schedule Now
Clicking this automatically schedules the running of the job. The Status will automatically change to Pending. Refreshing the page will change the Status. When Status is blank the job is done running.

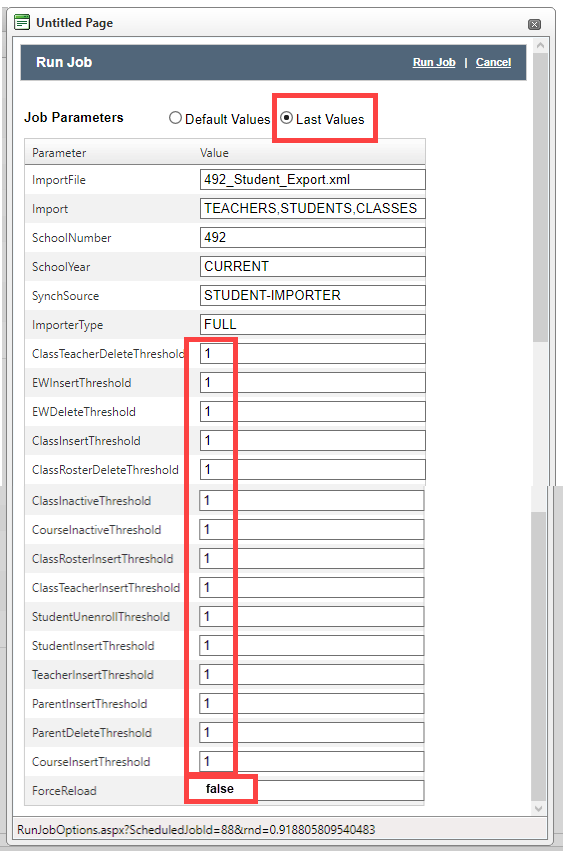
Run Now
Allows the user to set the parameters and run the job immediately.
It is most common to set the parameters to Last Values or set all thresholds to 1 and set force reload to false
Click Run Job
A window will open giving you live Job status as the Job runs.
Go to Job History
This is a shortcut to Job History (see Job History below)
Job History

Job Results
Set time frame to retrieve job results (filter)
From and To
Add date
Type in empty Field
Use the Calendar Selector
Refresh
Clears the time frame that has been entered

Refresh list
Refreshes the table
Go to Job Queue
Shortcut to Scheduled Jobs

Table

Action
Delete
Job ID
Job Number
Job
Job Name
Start Date
Time and date the job started
Finish Date
Time and date the job finished
Status
Warnings
Count of Warnings
Errors
Count of Errors
View
Displays the job details and results

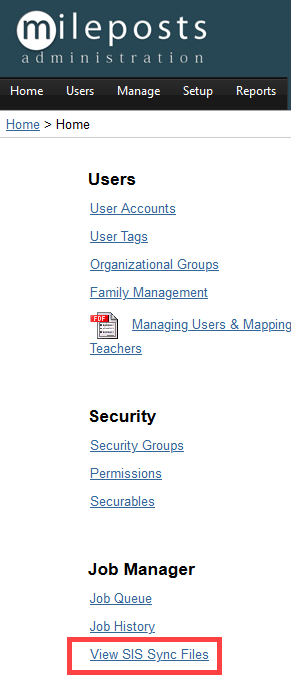
View SIS Sync Files
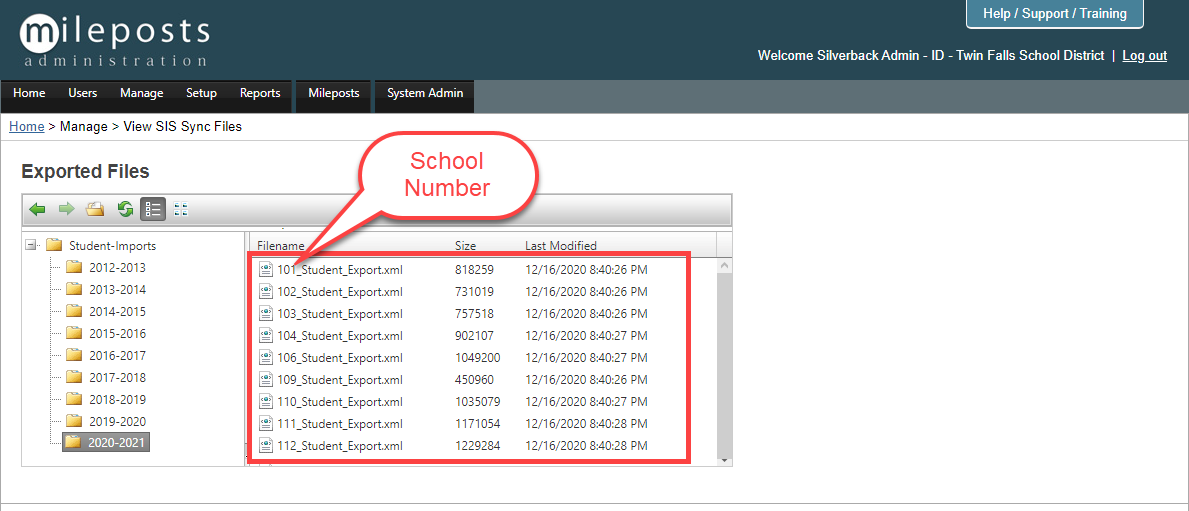
Exported Files
This screen is a file organizer that stores imports by school year

Navigation and View
Back
Forward
Files
Refresh
Grid View
Thumbnail View

Folder Tree
Select the type of import
Select year of import

Folders
Folders by school year

School Export files by school number
Clicking the file will open it
The file shows all data from the last SIS export
Related Articles
District Setup (Complete Guide)
The following information is a complete guide for setting up district specific configuration for Mileposts. District Information Districts Refresh list Refreshes the table Table Action Edit District Information General Tab District Number Name: Name ...Reports (Complete Guide)
Mileposts reports/logs Events and User Logins Event Log Set time frame to retrieve job results From and To Add date Type in the empty field Use the Calendar Selector Refresh Clears the time frame that has been entered Refresh list Refreshes the table ...SMS Setup (Complete Guide)
District Setup Districts Add new District/Edit General Tab Name: District Name Current School Year Public Key Sync Tab Sync Students: Checked =True True/Yes False/No Sync Enrollment: Checked =True True/Yes False/No Sync Classes: Checked =True ...Security (Complete Guide)
The security section is used for granting permissions and access to different tools or tasks in Mileposts Security Groups Groups A table of current Security Groups Add new Group General Tab Name Name of Security Group Public Key This will be auto ...Users (Complete Guide)
The User section of Admin Backstage is where all the following user management is done: User Accounts User Tags Organizational Groups Family Management User Accounts Click User Accounts First page of User Accounts is a table of users The headers on ...