Edify Assess and Google Classroom (Complete Step By Step
Create a Google Classroom
The following instructions are used in the case of creating a Google Classroom to sync with Edify Assess. These instructions are not intended to train you how to use Google Classroom.
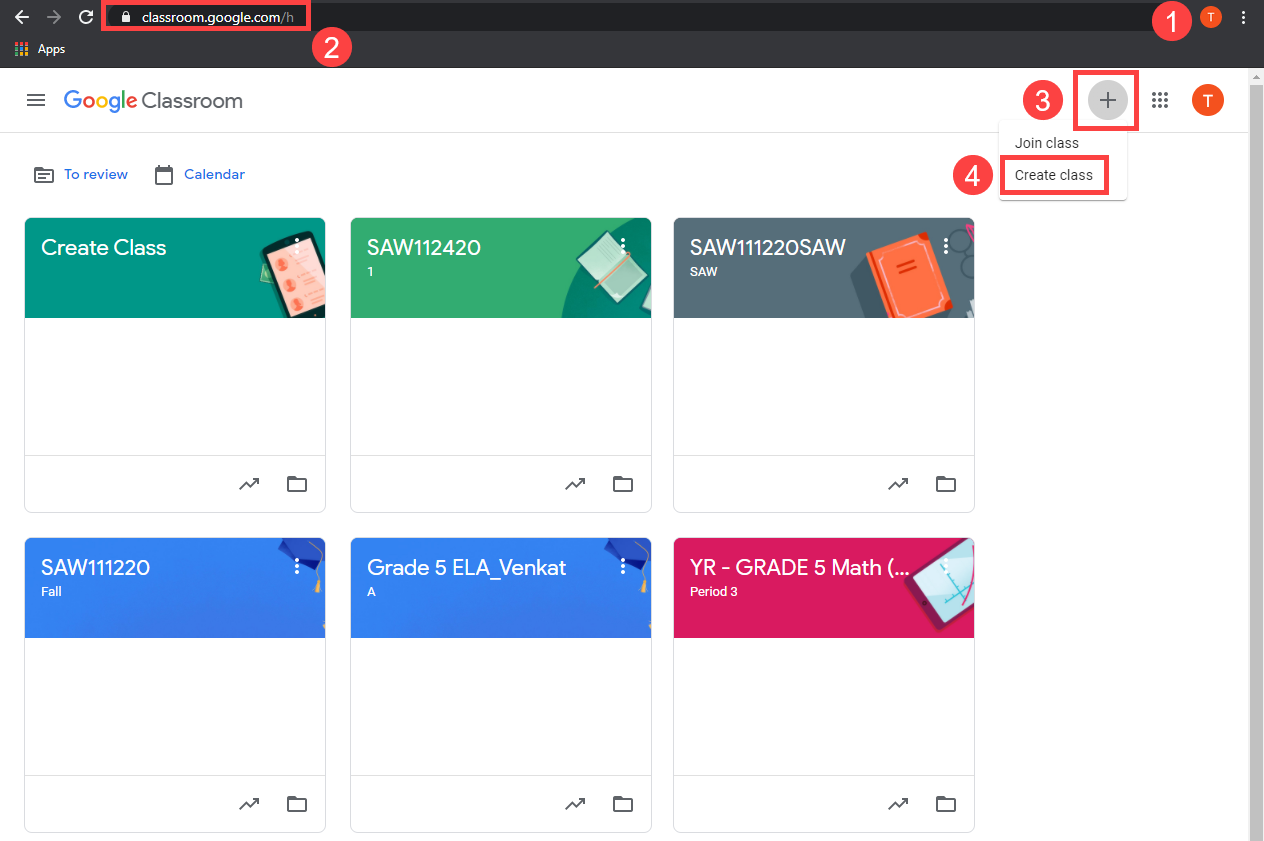
Login to Google Chrome Web Browser
Click +
Click Create class
Name the class (required)
Enter a Section (optional)
Enter the Subject (optional)
Enter a Room (optional)
Click Create

Adding Students to Google Classroom (via Invite)
The following steps are required to link students from Edify Assess to Google Classroom and are not designed to train you in using Google Classroom.
Click People
Click the Add Students button
Type the students email address
Click the students information for the correct student
Repeat for all students
Click Invite
Students will receive an email inviting them to the class. Students will need to do the following:
Students Accepting the Invite
Students need to accept the invite before student linking with Edify Assess and Google Classroom will occur.
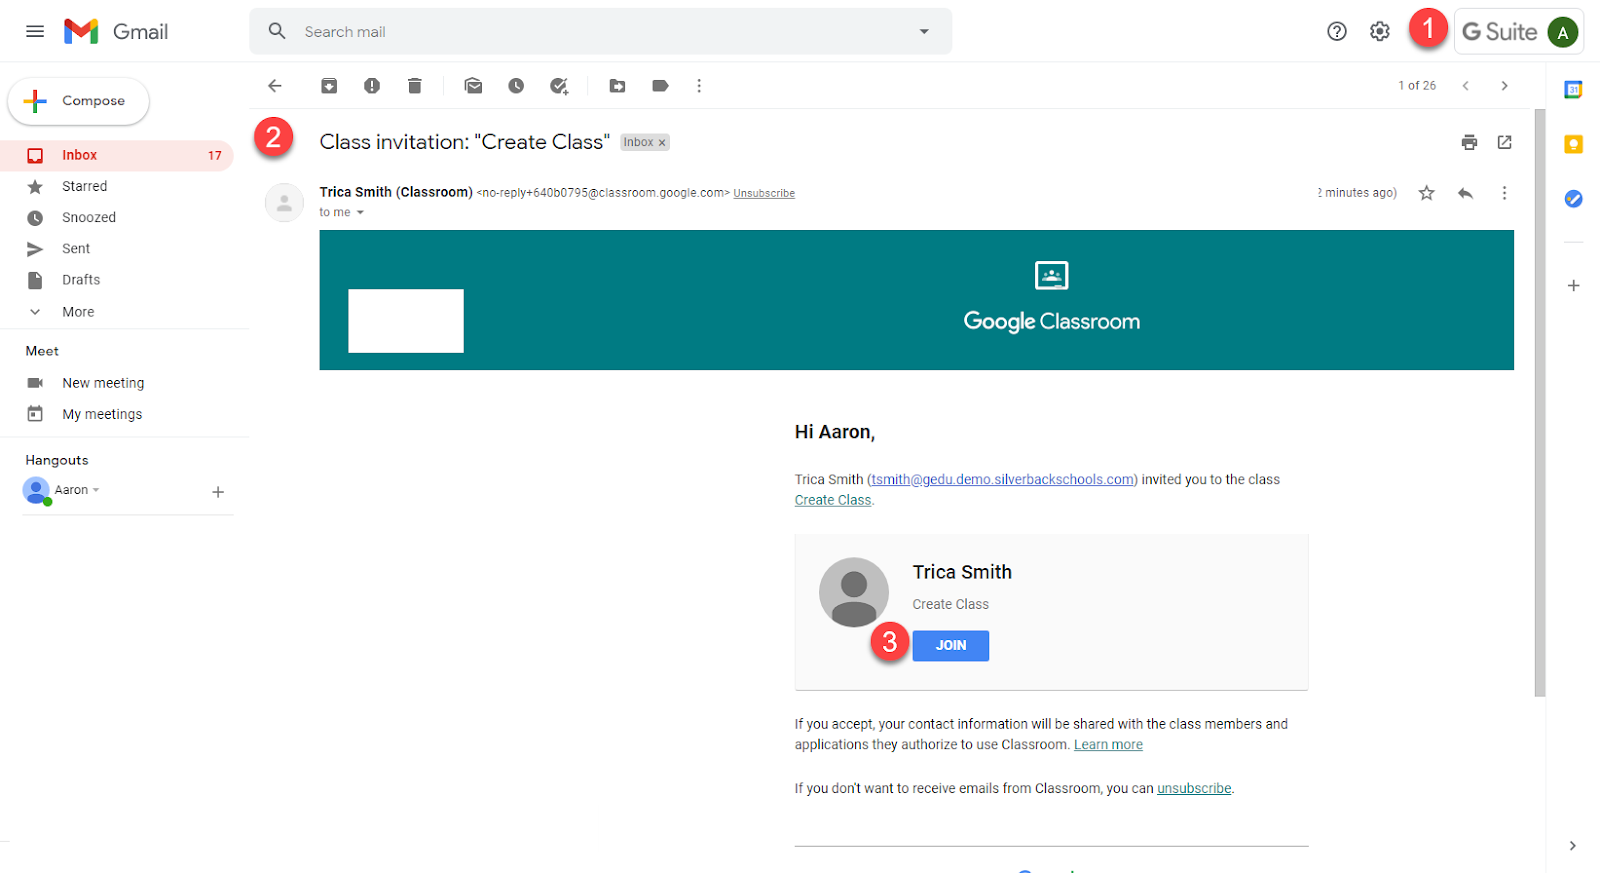
Login to Gmail
Find/open Invite email
Click Join
This grants access and open the specific Google Classroom
Creating a Class in Edify Assess linked to Google Classroom
The following steps are intended for districts that are using Edify Assess and Google Classroom together and have already made the necessary configurations. These configurations need to be completed before linking Edify Assess and Google Classroom.
Creating an Edify Assess Class
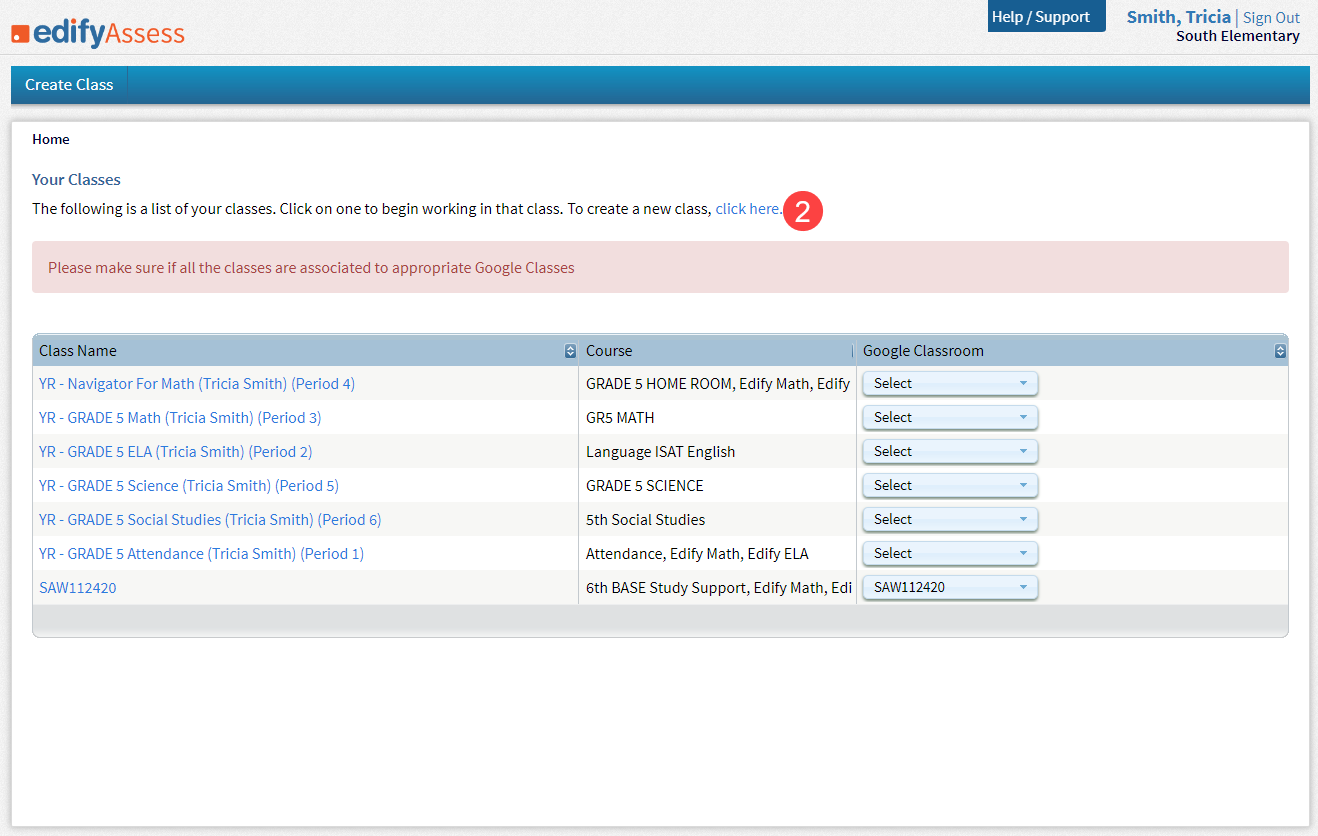
Login to edify Assess
Click click here
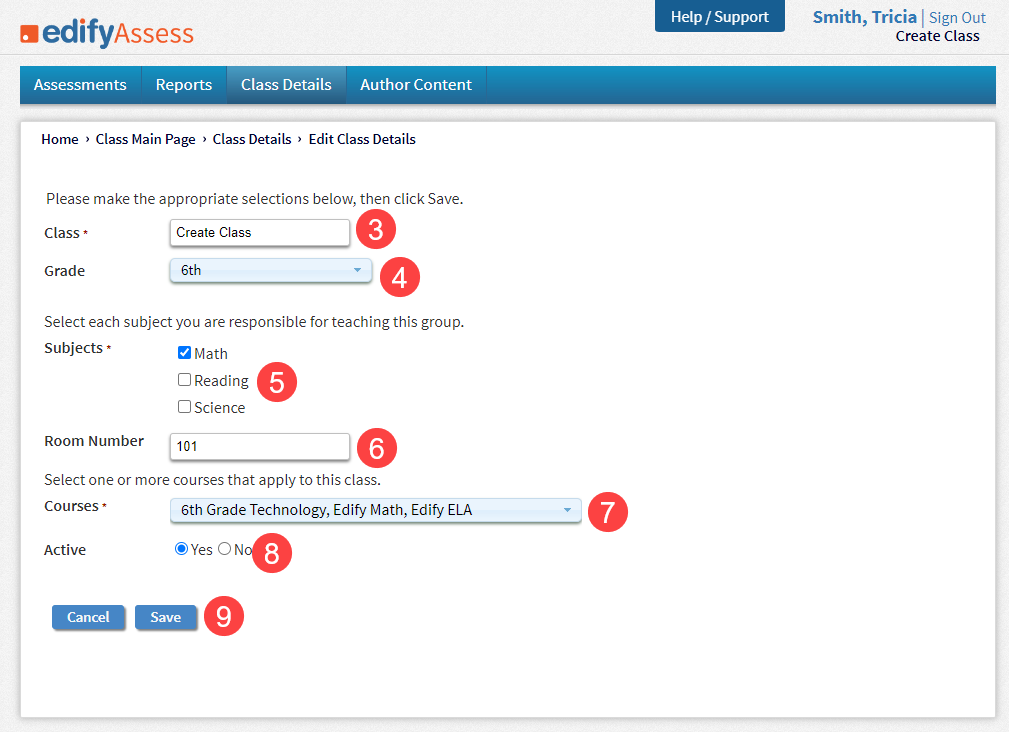
Name the Class (required)
Suggested: Name the same as the Google Classroom that was created earlier but is not mandatory.
Select Grade (optional)
Select Subjects (required, multiple can be selected)
Room Number (optional)
Select Courses (required, multiple can be selected)
Active (should be marked Yes)
Click Save
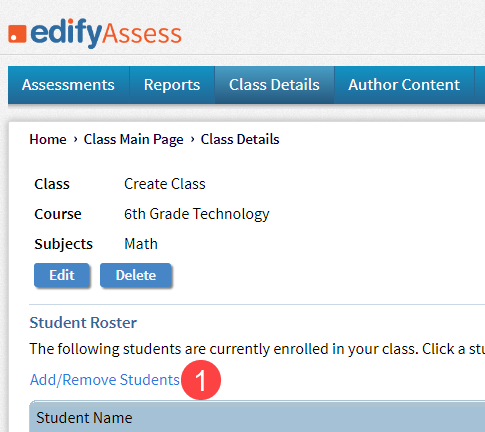
Adding Students to Edify Assess Class
Click Add/Remove Students
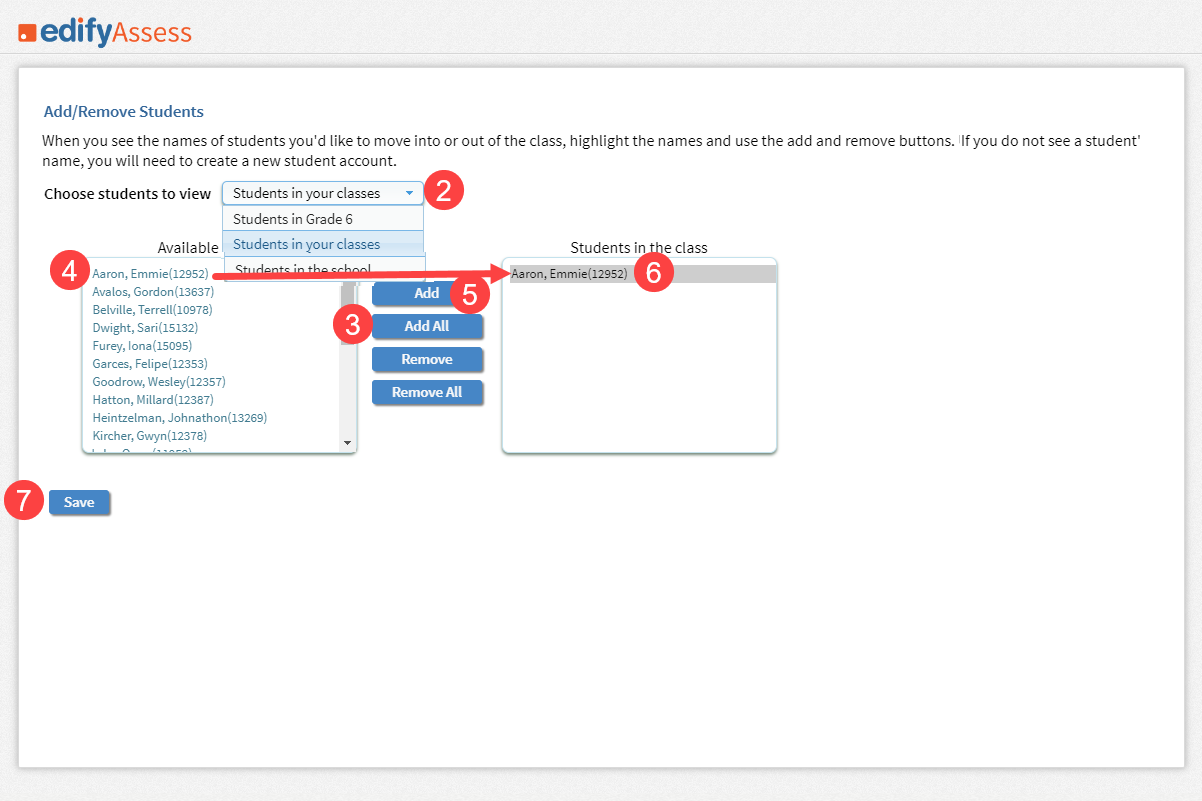
Select students to view
Click the dropdown arrow
Select a classlist
Clicking Add All button selects all the students in the available students list and moves all of them from the available students list on the left of the screen to students in the class list to the right of the screen.
Click the student from the available students list on the left of the screen
Only one student at a time can be selected.
Click Add
That student will be moved from the available students list on the left to students in the class list to the right.
Click Save
Remove Students to Edify Assess Class
Click Add/Remove Students
Clicking the Remove All button selects all the students in the students in the class list and moves them all from the students in the class list on the right of the screen to the available students list to the left of the screen.
Click the student from the students in the class list on the right of the screen
Only one student at a time can be selected.
Click Remove
That student will be moved from the students in the class list on the right to available students list to the left.
Click Save

Link Edify to Google Classroom
The following steps must be completed for a successful link between Edify Assess class and a Google Classroom class.
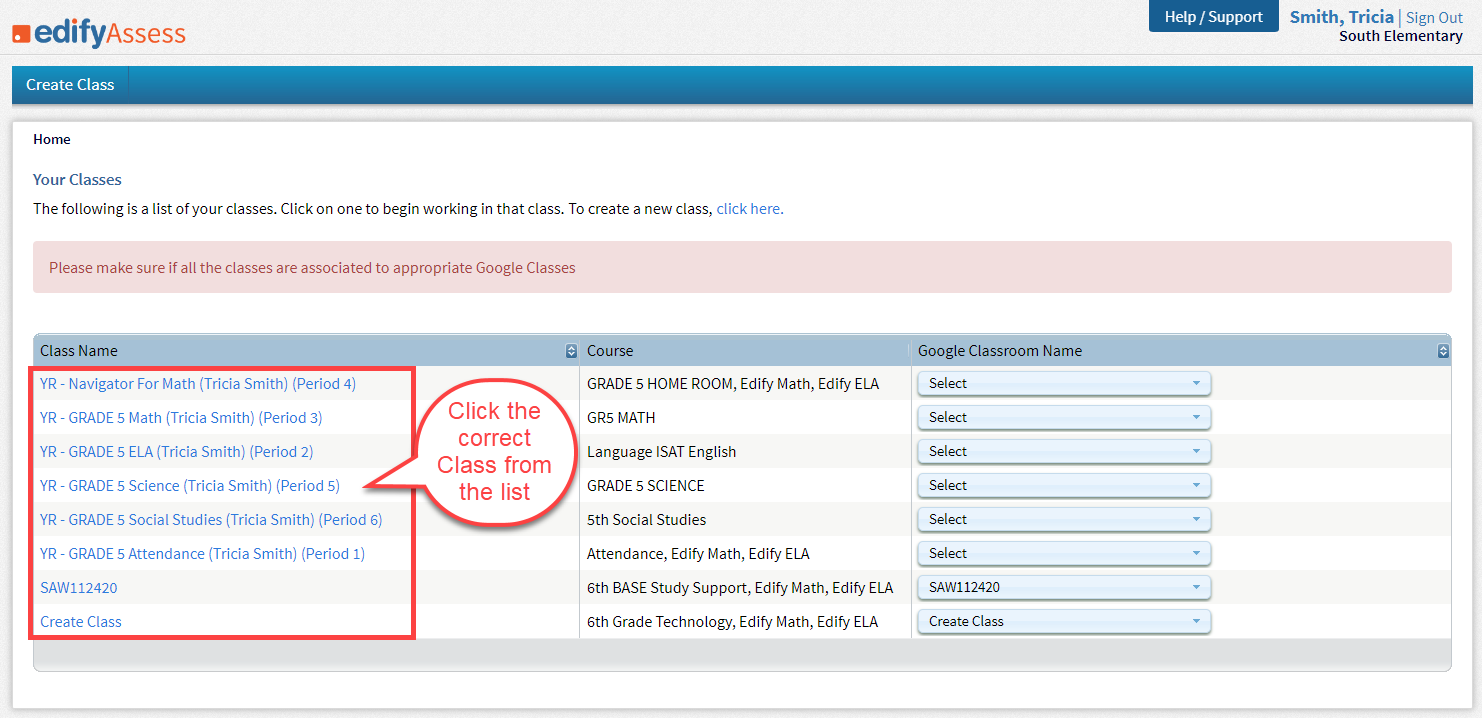
Click Home
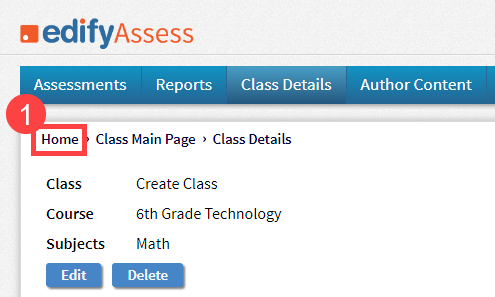
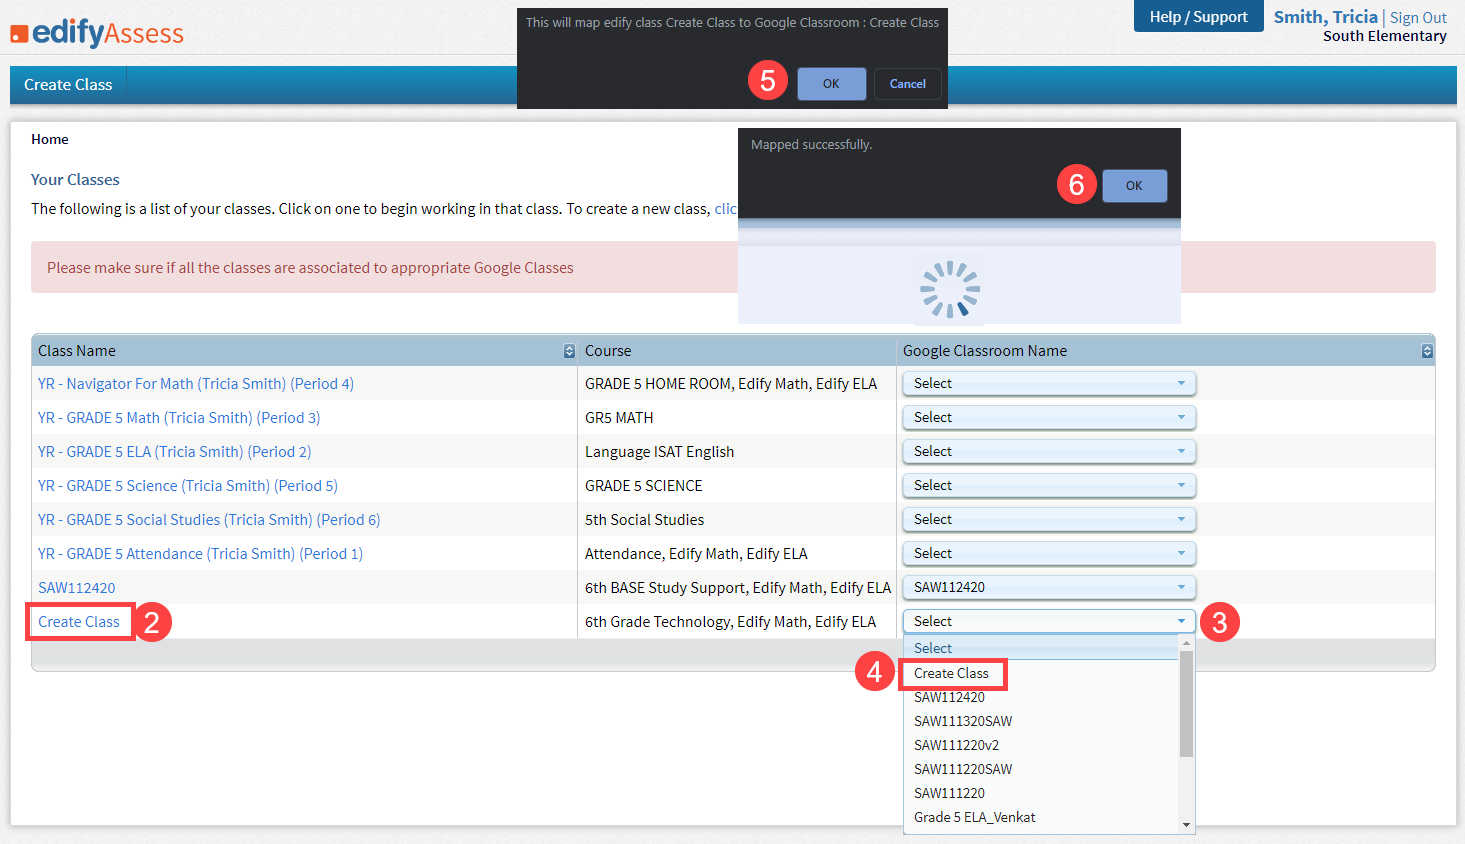
Find the class you just created in Edify Assess (under Class Name)
Click the dropdown (under Google Classroom Name)
Select the class that you created earlier in Google Classroom.
This is a good reason to name them both the same.
Click OK to map/link the two classes
Click OK when the window opens and says Mapped successfully
(Feature Request) Check Class Roster
Assign Assessment
Assessments need to be assigned in Edify Assess but will automatically be added to Google Classroom for the teacher and the student.
Select the class
Click the correct class from the list
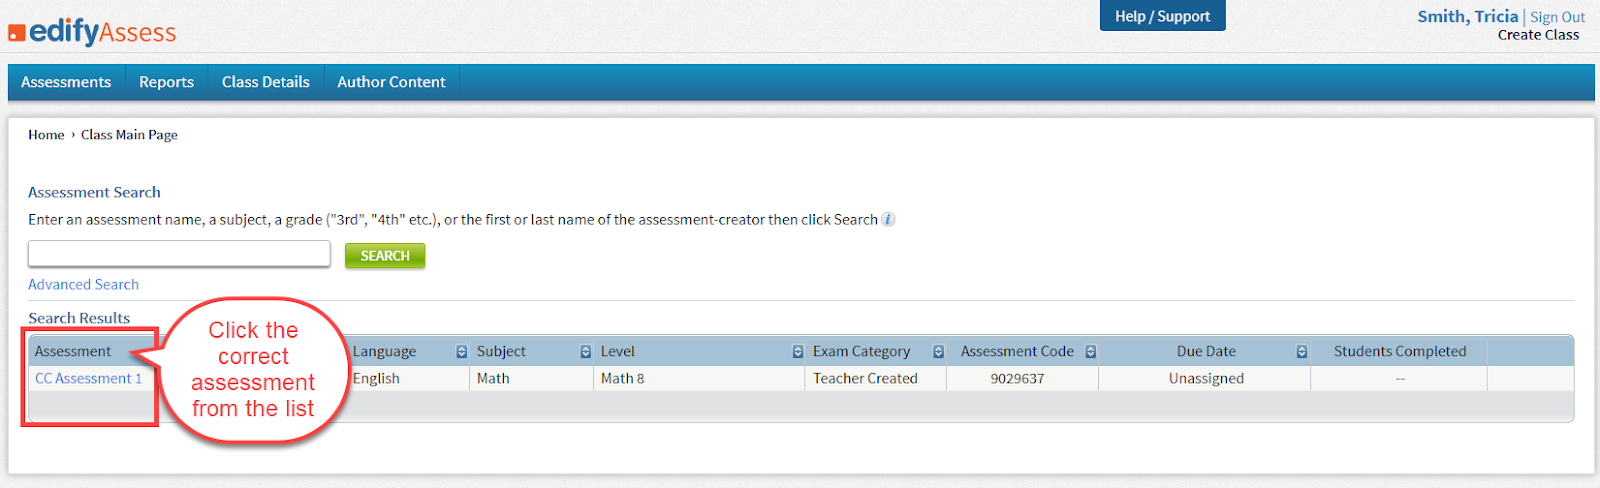
Select the assessment
Select Assign

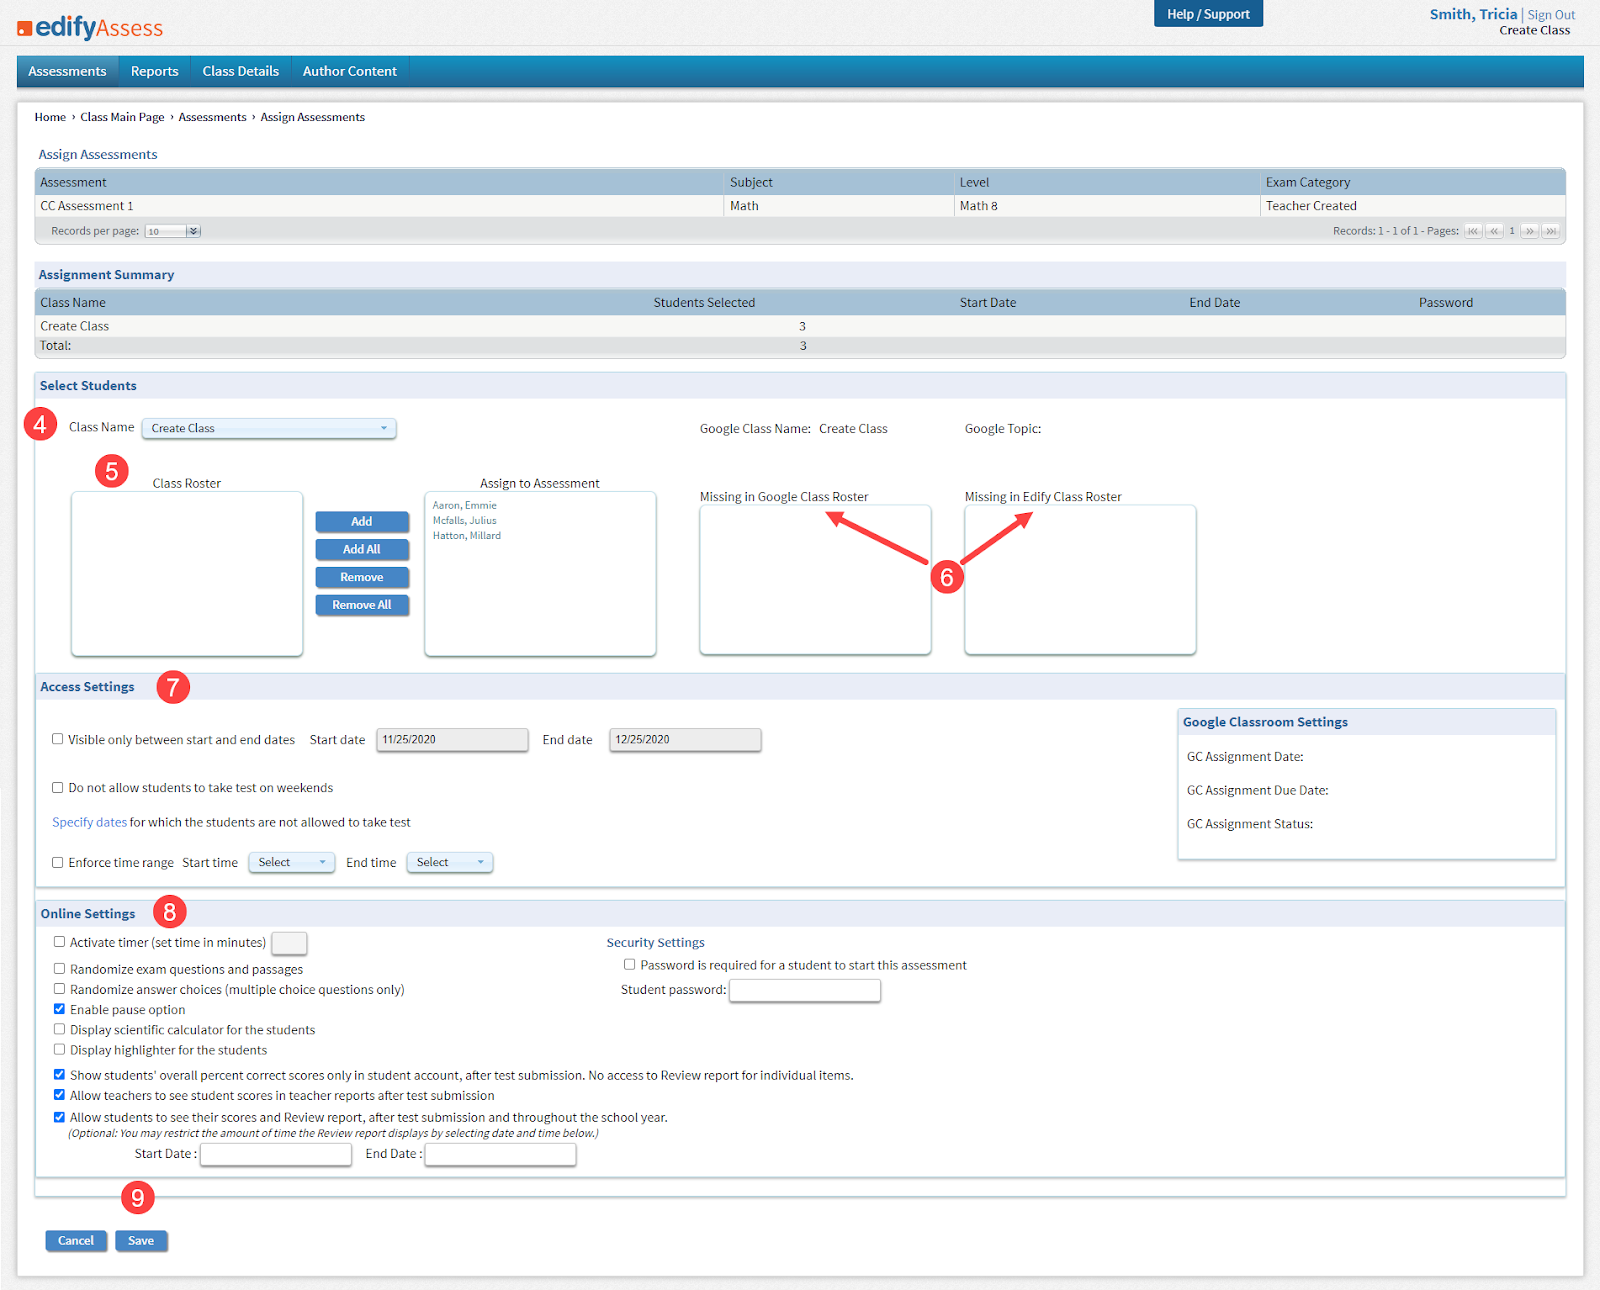
Class Name
This is auto defined from previous selections but can be changed here
Add Students from Class Roster to Assign Assessment
This should already be correct but if a student needs to be added it can be done from here
Check that no students are in the Missing in Rosters boxes
Set Access Settings (optional)
Set Online Settings (optional)
Click Save
The assessment has been assigned to the selected students. They are automatically assigned the assessment in Google Classroom and will have access when assigned.
Take Assessment (Students)
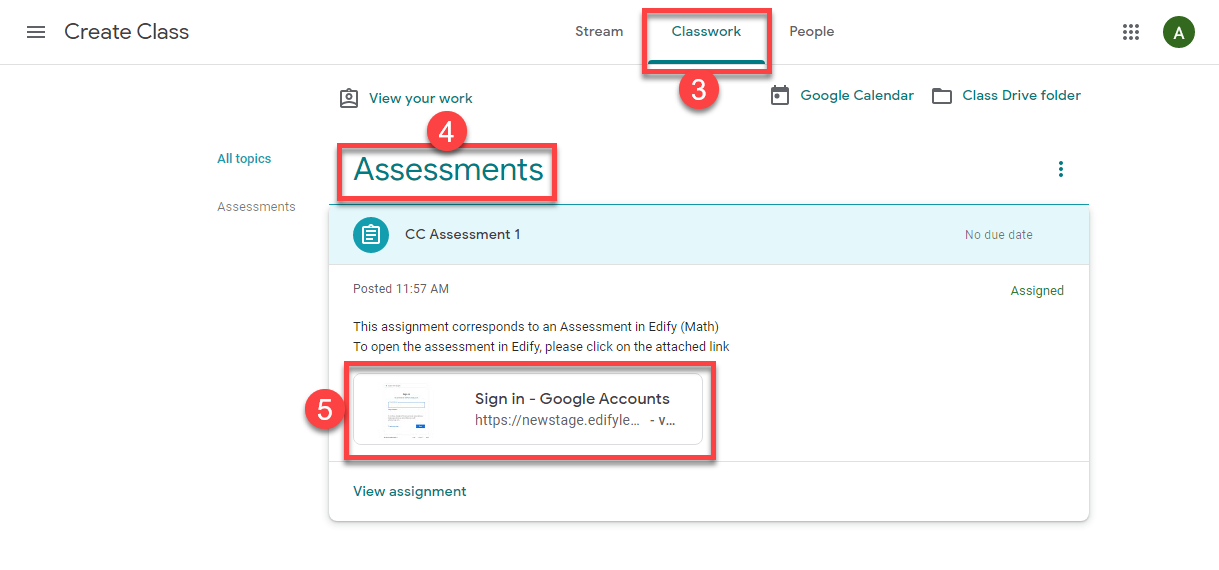
Students can access the assessment in Edify Assess automatically from Google Classroom by clicking the assessment in the Classwork Tab, Assessment Section.
Login to Google Classroom
Select the correct Class

Click Classwork Tab
In the Assessment section
Select the correct Assessment
This will open Edify Assess and the appropriate assessment (be patient this takes some time)
The assessment is open at Question 1 in a secure test tunnel. The student can answer the questions and
The student can
Adjust the font size
Navigate to the finish assessment page
Flag the question for later inspection
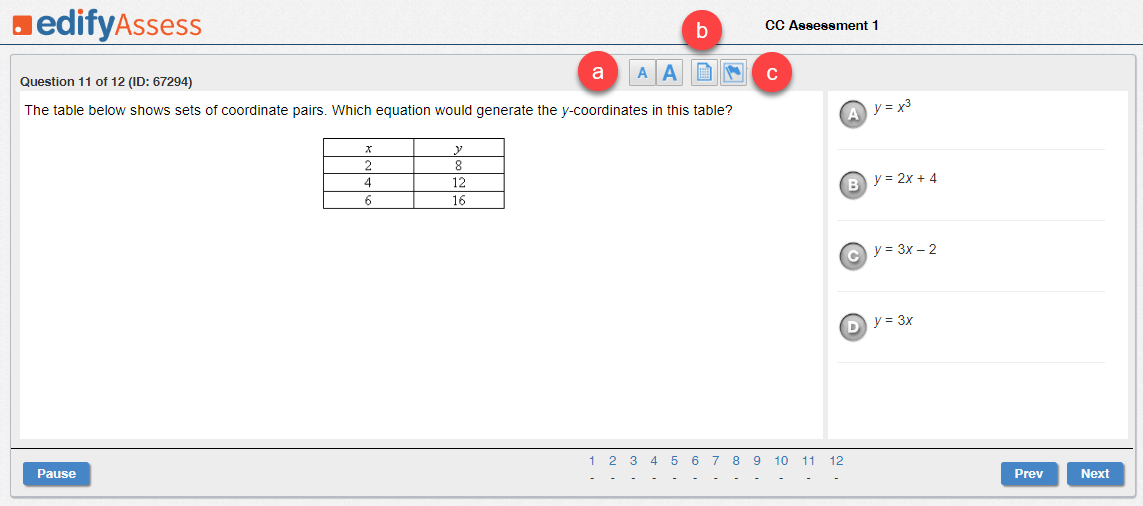
Click Next
Repete for all questions.
OR
Click Previous
If a student needs to return to a previous question
OR
Click the question number
To move to the selected question
OR
Click Pause
If a student needs to stop the assessment for any reason

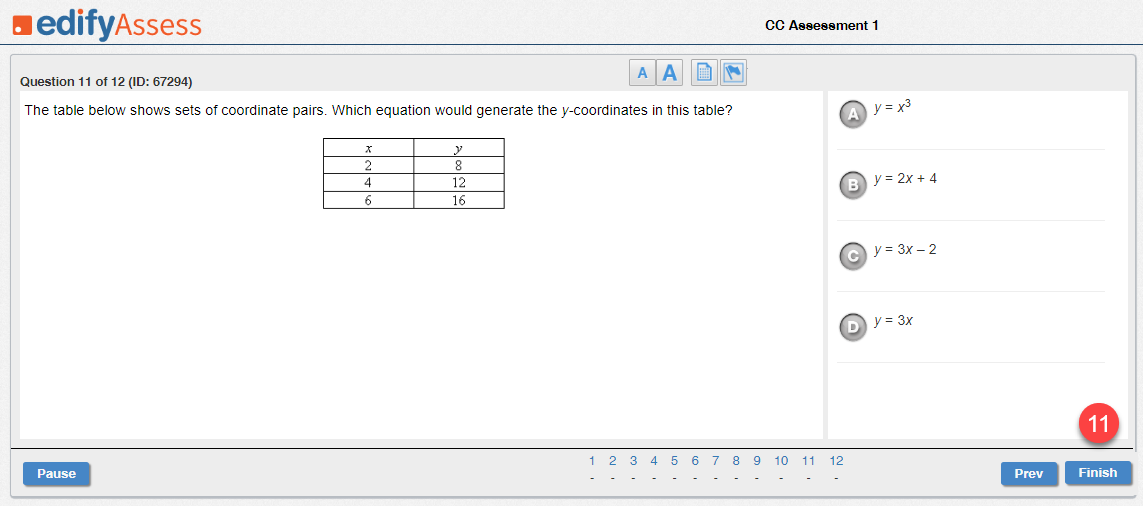
Click Finish
After the last question the student can click Finish
Click Question Number
To review and edit a specific answer for a question
OR
Click Return to Test
To review and edit the assessment
OR
Click Grade Test
To mark as complete and have the system grade the test via the Answer Key
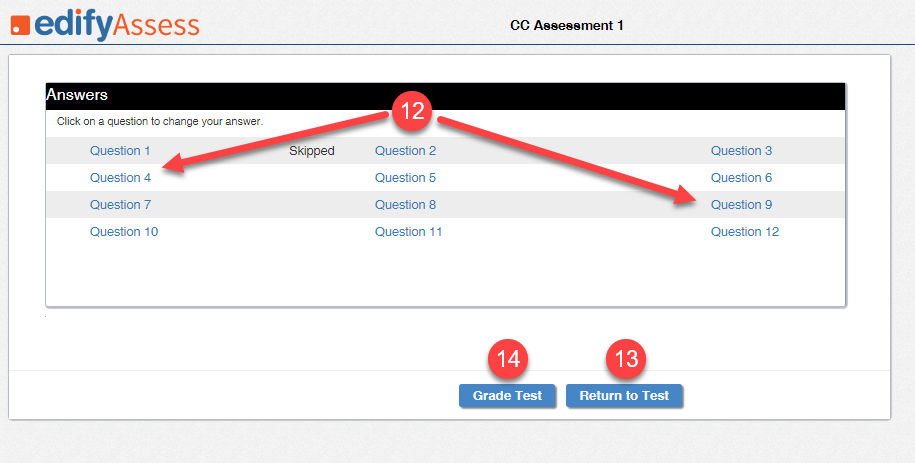
Click OK
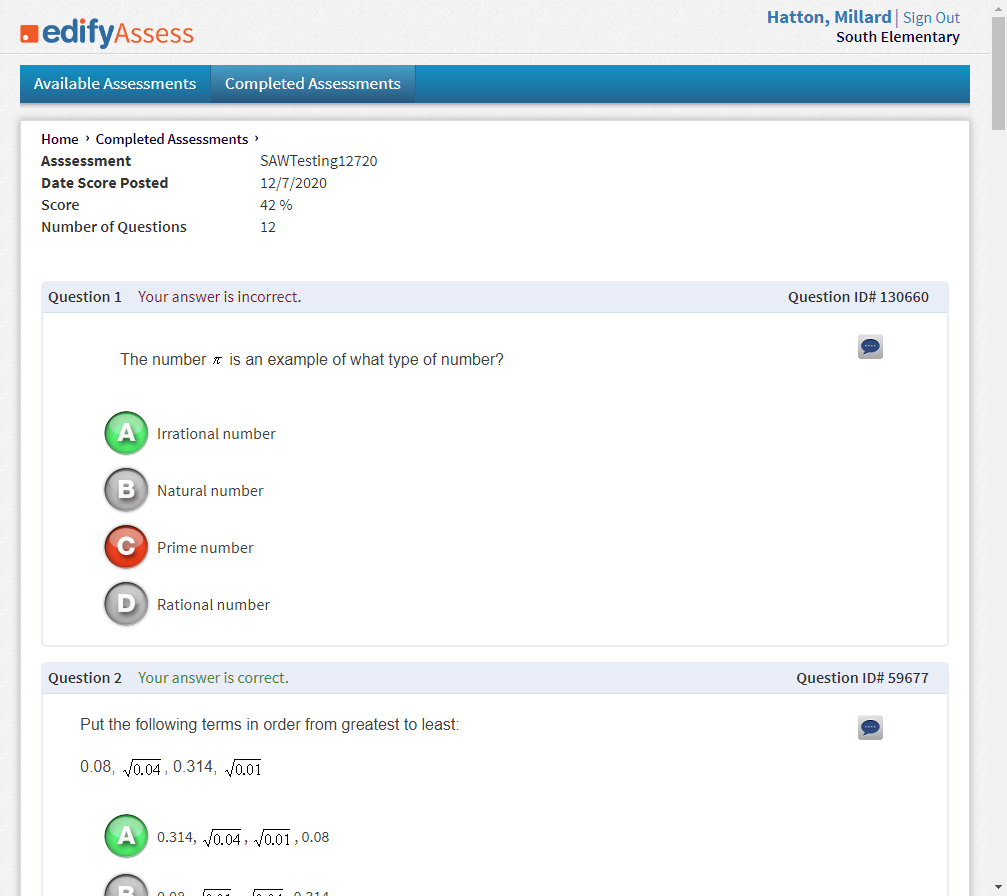
This navigates the student to the Completed Assessment page.
The student can
See the Score
The score is displayed in the table
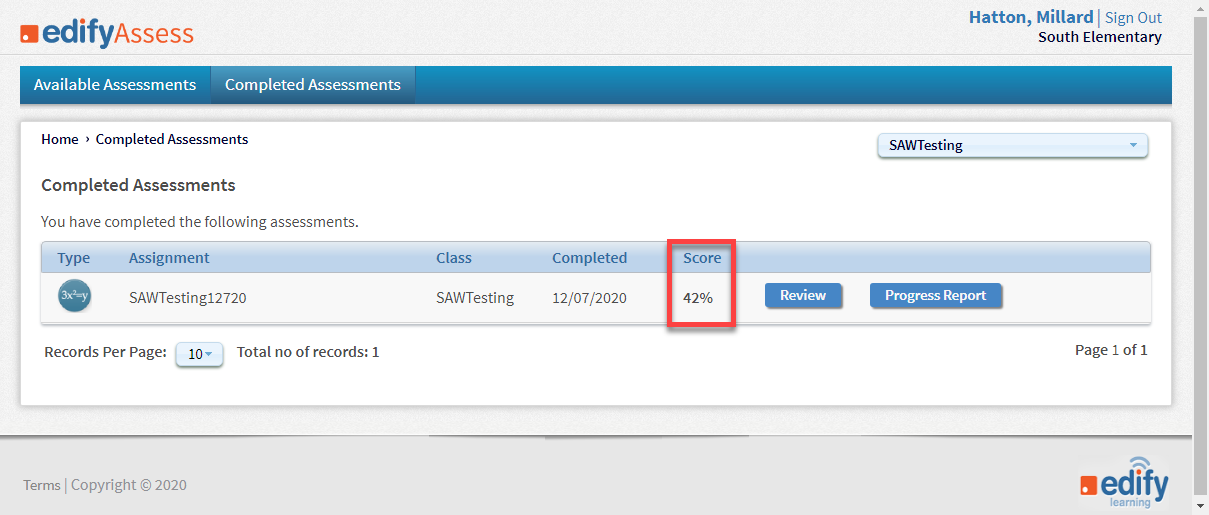
Review
Review the questions individually

View Progress Report
This opens the Completed Assessments Student Report showing all completed assessments and graphing the students scores with a readiness ceiling.
Click Available Assessments
To return to the list of open assessments

Edify Assess Assessment Actions (Teacher)
The following actions are incredibly helpful for a teacher conducting an assessment. Navigate to the desired assessment from Edify Assess homepage.
Choose class
Find and click the Assessment
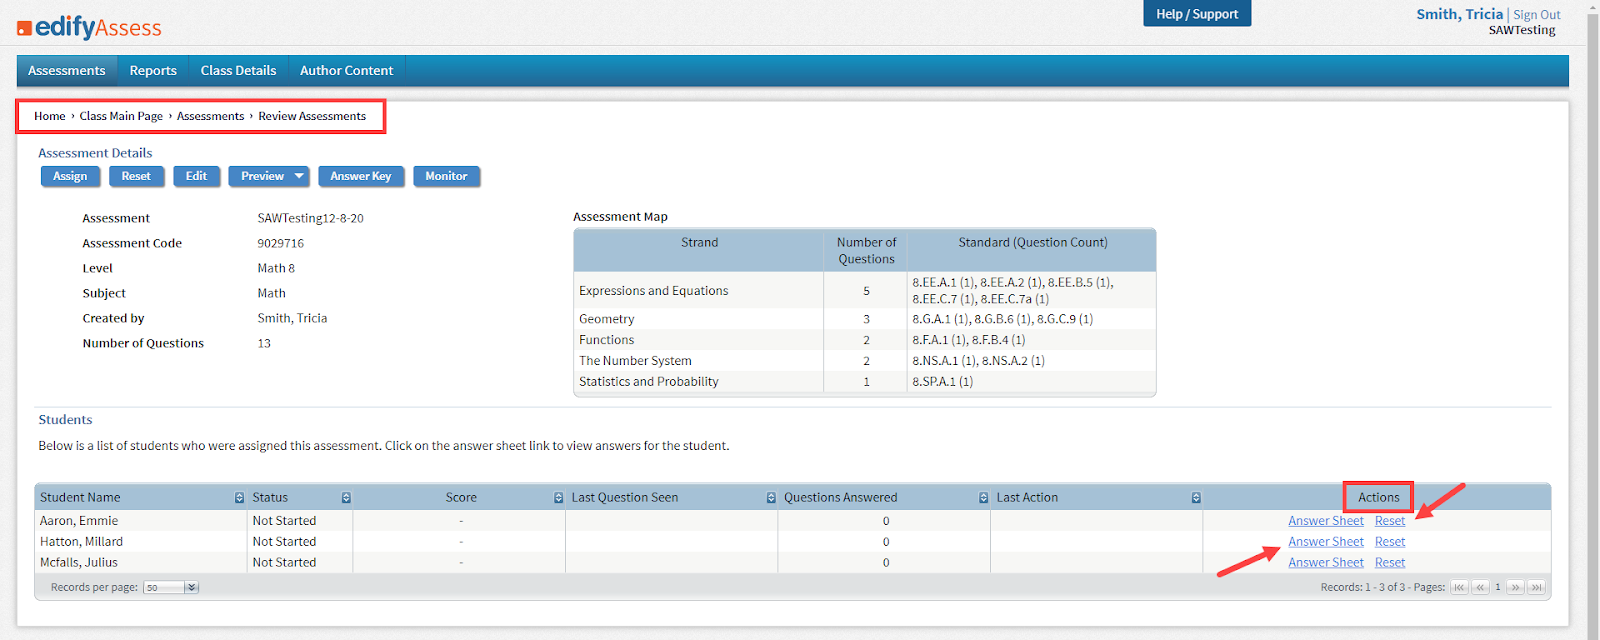
On the students table find the Actions column
Reset
Used if a student has started the assessment and needs to restart the assessment.
Answer Sheet
Used to access the following individual student assessment tools.
Manually enter answers
Used to manually enter student selected answers. Handy when a student takes an assessment on paper.
Mark All Correct Answers
Clicking this will mark all the correct answers. Also helpful when manually entering student selected answers and the student scored 100%
Score Assessment
Used to score an assessment that was manually entered.
Clear Responses
Used to clear all the responses to start manually entering over.

Google Classroom Status
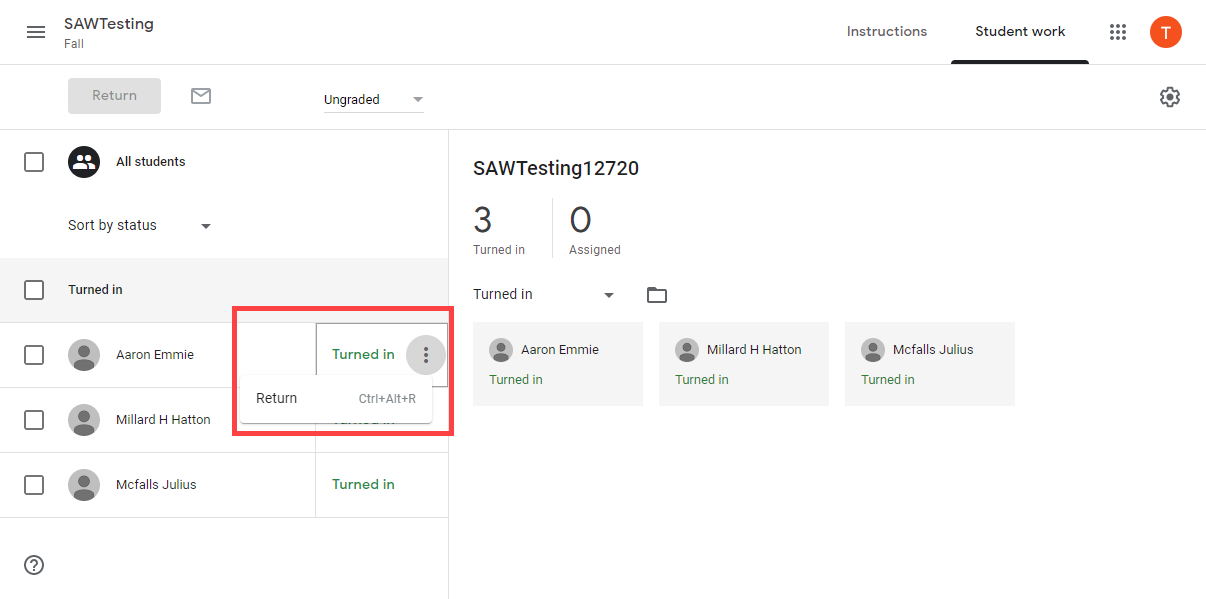
Teacher View
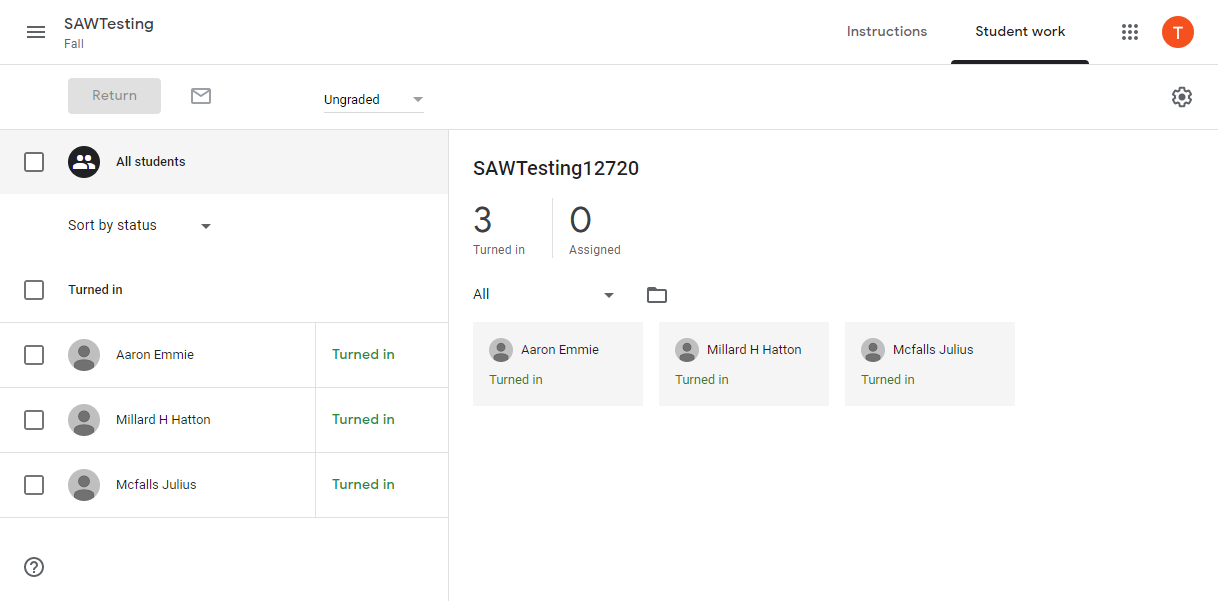
In Google Classroom the Classwork Tab will show the Assessment as how many students were assigned the assessment as Assigned until the assessment is scored. Once Scored it will show the number of students that have turned in the assessment as Turned in.

Clicking either Turned in or Assigned takes the teacher deeper and opens the Student Work page with status for all students.
Clicking the students name on the list on the left of the screen shows the students Turned in history
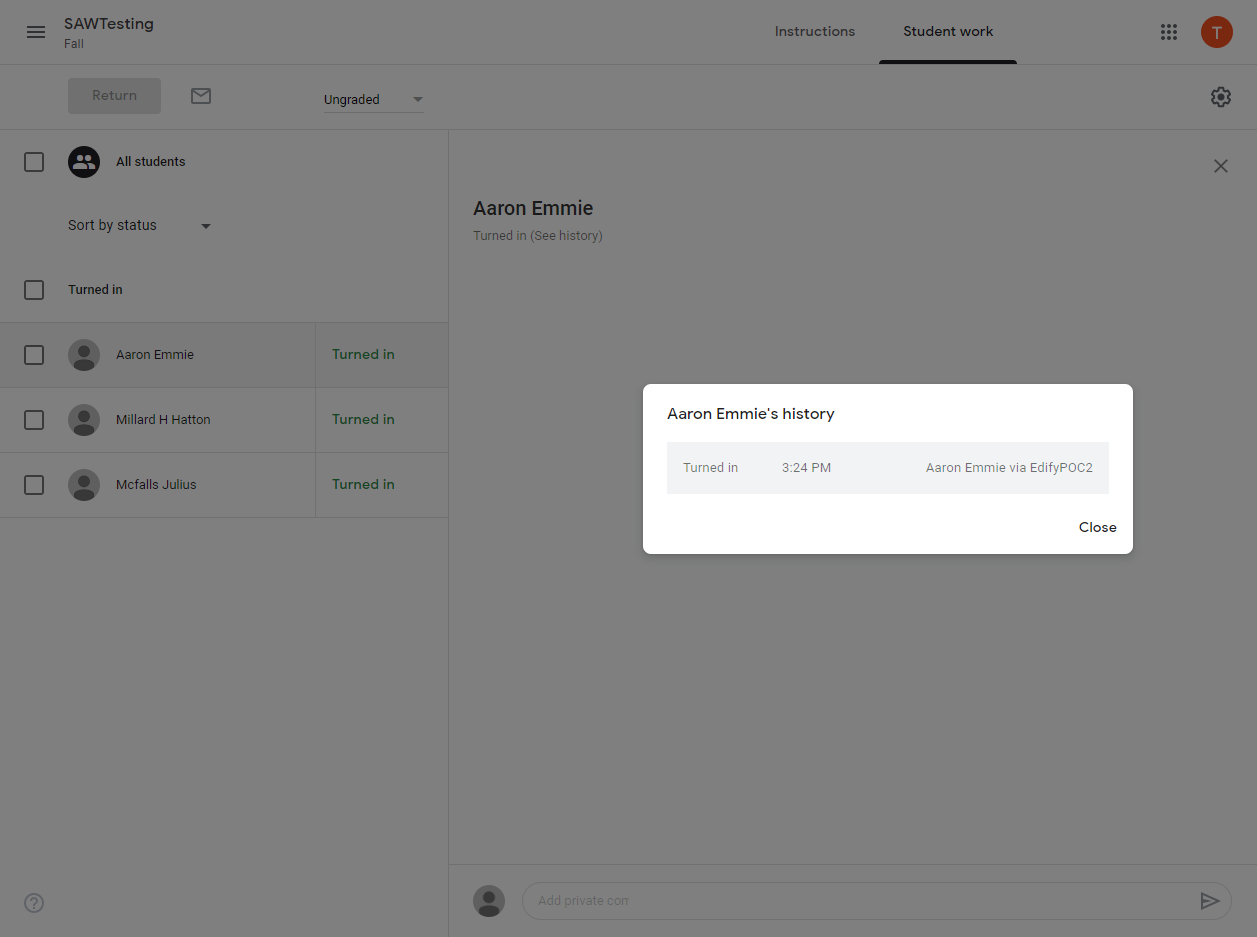
Clicking the Turned in button gives the teacher the opportunity to return the assessment.
Student View
In Google Classroom the Classwork Tab will show the Assessment as Assigned until the assessment is scored. Once Scored it will show Turned in.

Related Articles
Link Edify to Google Classroom
Link Edify to Google Classroom The following steps must be completed for a successful link between Edify Assess class and a Google Classroom class. Click Home Find the class you just created in Edify Assess (under Class Name) Click the dropdown ...Students Accepting Google Classroom Invite
Students Accepting the Invite Students need to accept the invite before student linking with Edify Assess and Google Classroom will occur. Login to Gmail Find/open Invite email Click Join This grants access and open the specific Google ClassroomGoogle Classroom Status Student View
Student View In Google Classroom the Classwork Tab will show the Assessment as Assigned until the assessment is scored. Once Scored it will show Turned in. Clicking the assessment will take the student to Edify Assess Available Assessments page.Adding Students to Google Classroom (via Invite)
The following steps are required to link students from Edify Assess to Google Classroom and are not designed to train you in using Google Classroom. Starting from the homepage of a specific Google Classroom Click People Click the Add/Invite Students ...Adding Students to Edify Assess Class
From the Edify Assess homepage: Choose the class Choose the assessment Click Assign If the assessment is already assigned click the assessment name Adding Students to Edify Assess Class Click Add/Remove Students Select students to view Click the ...