Creating a Group Progress Monitor
Create a Group Progress Monitor
Setting up a Progress Monitor allows teachers the ability to quickly create a graph to monitor a student’s progress throughout an intervention.
This adaptive tool can graph progress for behavior, attendance, weekly quiz scores, and many other purposes. The quick and easy set up makes it simple for any teacher to utilize.
Set up a Group Progress Monitor: (Part 1)
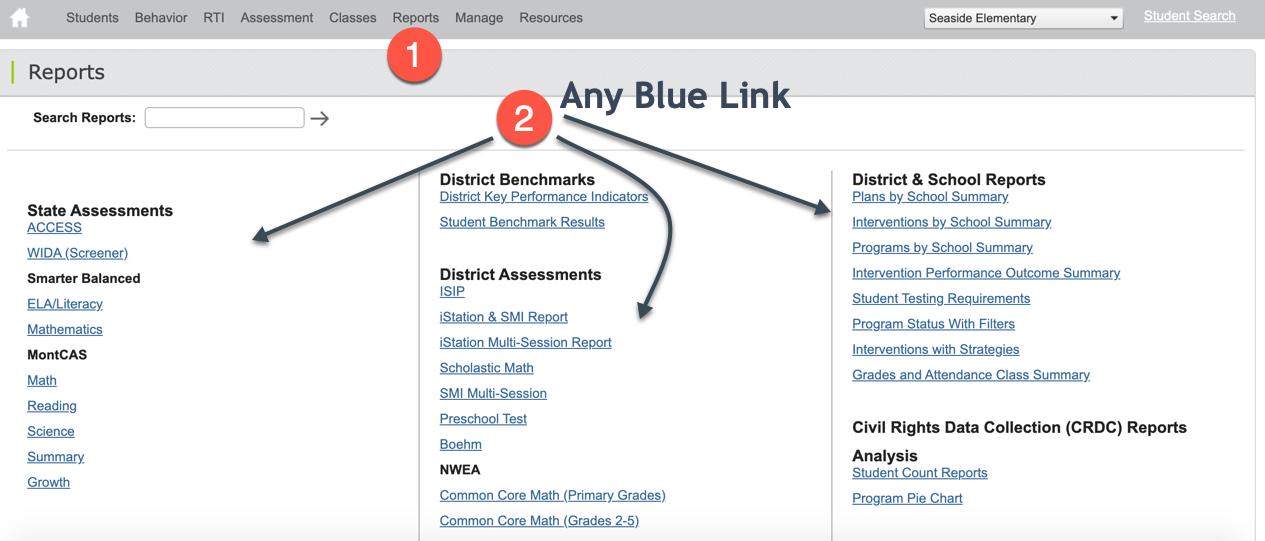
Click on Reports from the homepage.
Select any Report or Assessment.
Click on the drop down menu to select a Class.
Select the Students by checking the box to the left of their name.

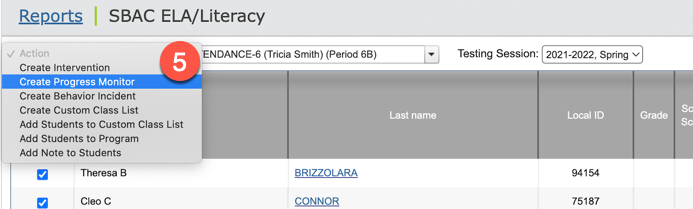
Once all students have been selected, use the Action tab dropdown menu and select
Create Progress Monitor.
Create Your Group: (Part 2)
Fill in Progress Monitor Name, Start Date, End Date, Testing Interval in Days, Probe (Assessment), and Type.
Then click Next.

Select Measure Type by using drop down menu, type Measure Display Name, Click Graphable and fill out the Goal.
Click Next in the upper right corner.

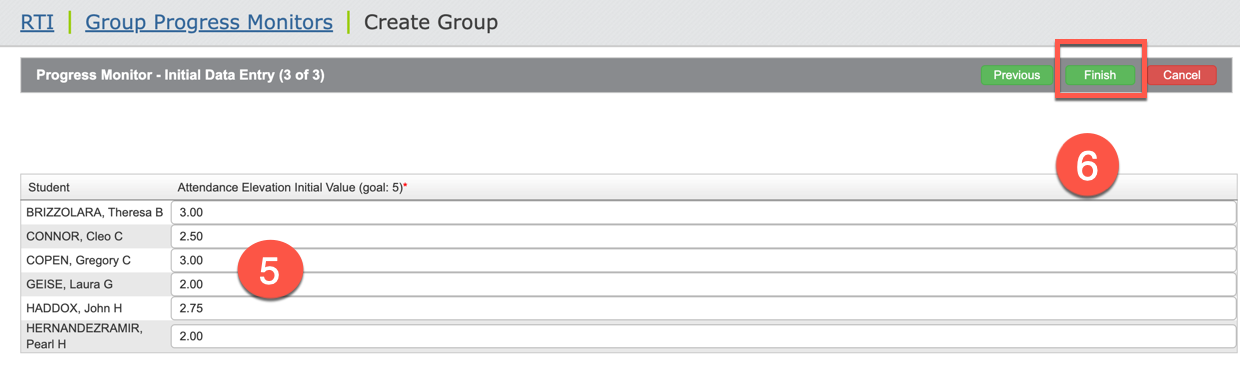
Fill in the Initial Value for each student.
Click the Finish button.
Manage Progress Monitors: (Step 3)
From the Homepage scroll down to Plans, Monitors, Behaviors and click on
Group Progress Monitors.
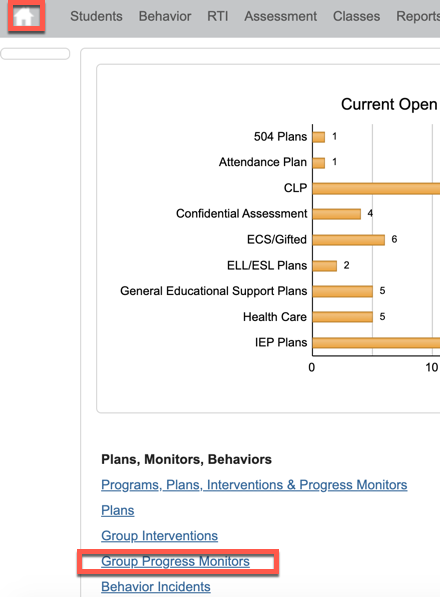
Here you can choose which Progress Monitor you want to work with and use the Actions drop down menu to decide what you want to manage.
