Advanced Portfolio Item Editing
Creating an Artifact is done in a Rich Text Editor, similar to Microsoft Word, Google Docs or your favorite editor. And, like those editors Teacher Vitae supplies the tools needed to help make your documents professional. In this Support Solution we will be looking at all the tools available.
Login to Teacher Vitae
Click “My Portfolio”

Choose the Artifact that you would like to Edit:
Select the Folder the Artifact is located in and then select the Artifact.
Or create a New Folder and/or a New Artifact (For more information on creating new folders and Artifacts See: Managing Portfolio Documents).
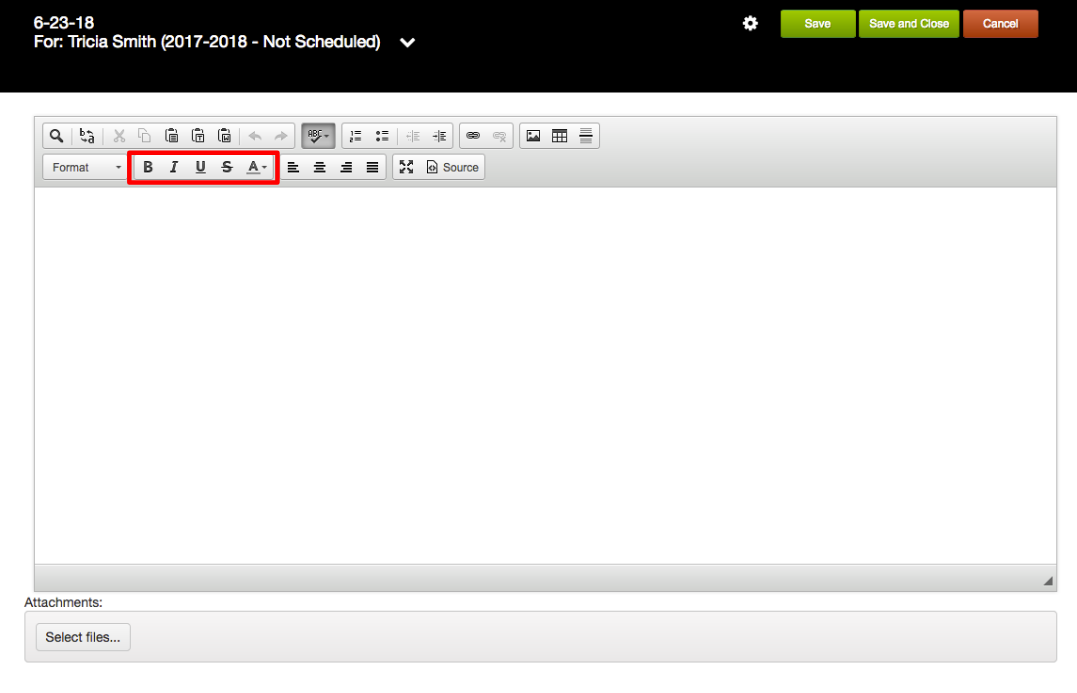
When you open an Artifact you are presented with a RichTextBox that has the tools that you use in your favorite text editor.
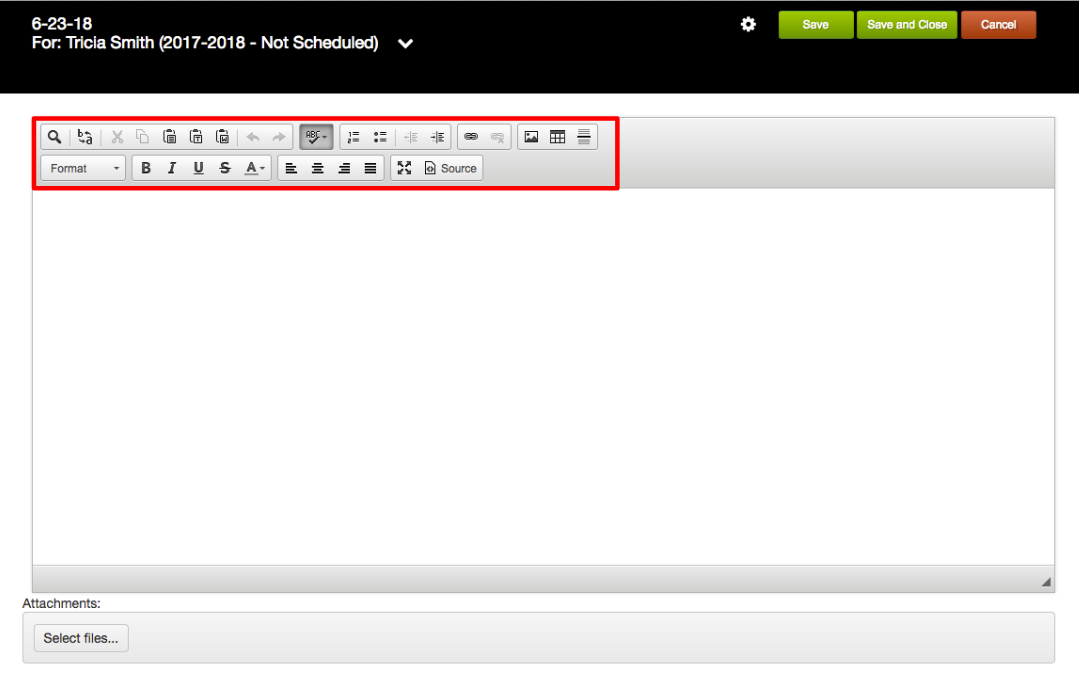
Tools:
Find: Used to find specific word or group of words in a text.
Find and Replace: Used to find a word or group of words then replace them with something different.

Cut: Used to remove text from a document to then be pasted into the document in a different location.
Copy: Used to place identical text in additional locations in the document.
Paste: Used after a group of text has been cut or copied to insert that text into the document.
Paste in Plain Text: Used after a group of text has been cut or copied to insert that text into the document with none of the original formatting.
Paste from Word: Used after a group of text has been cut or copied from Word to insert that text into the document using the formatting from a Word document.

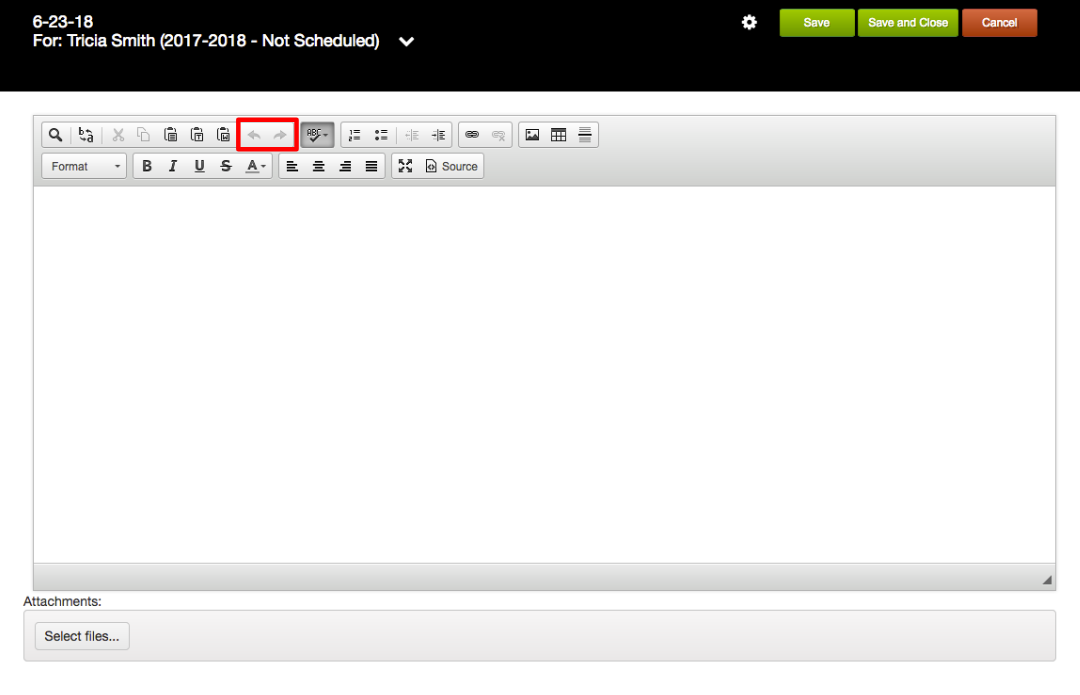
Undo: Used to go back to your last state before an edit.
Redo: Used to return text after an undo.
Spell Checker: Used to check the spelling of an entire document. The incorrect words will be displayed one incorrect word at a time giving you suggestions to possible correct spellings.

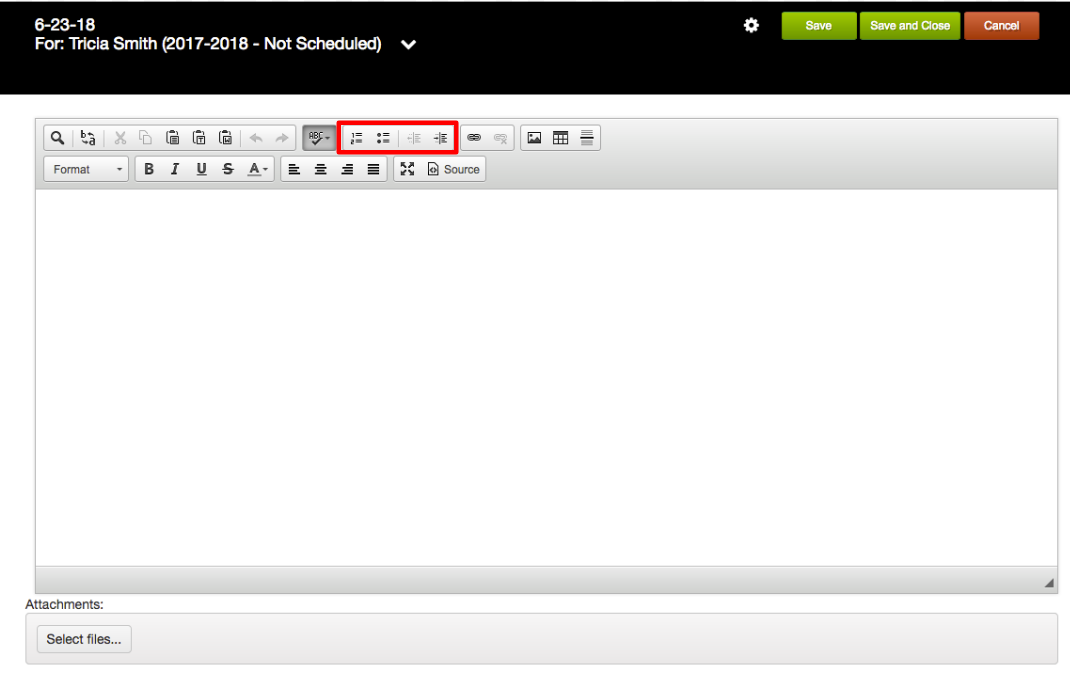
Numbered LIst: Used to create list differentiated by numbers.
Bulleted List: Used to create list differentiated by dots/bullet points.
Decrease Indent: Used to decrease the indentation used on the document.
Increase Indent: Used to increase the indentation used on the document.
Insert Hyperlink: Used to create links to other pages found on the internet.
In most circumstances leave the “Link Type” as URL, cut and paste the URL into the URL textbox and click “OK”.
The “Target” and “Advanced” tabs at the top are only used in advanced situations.

Remove Hyperlink: Used to remove links to other pages found on the internet.
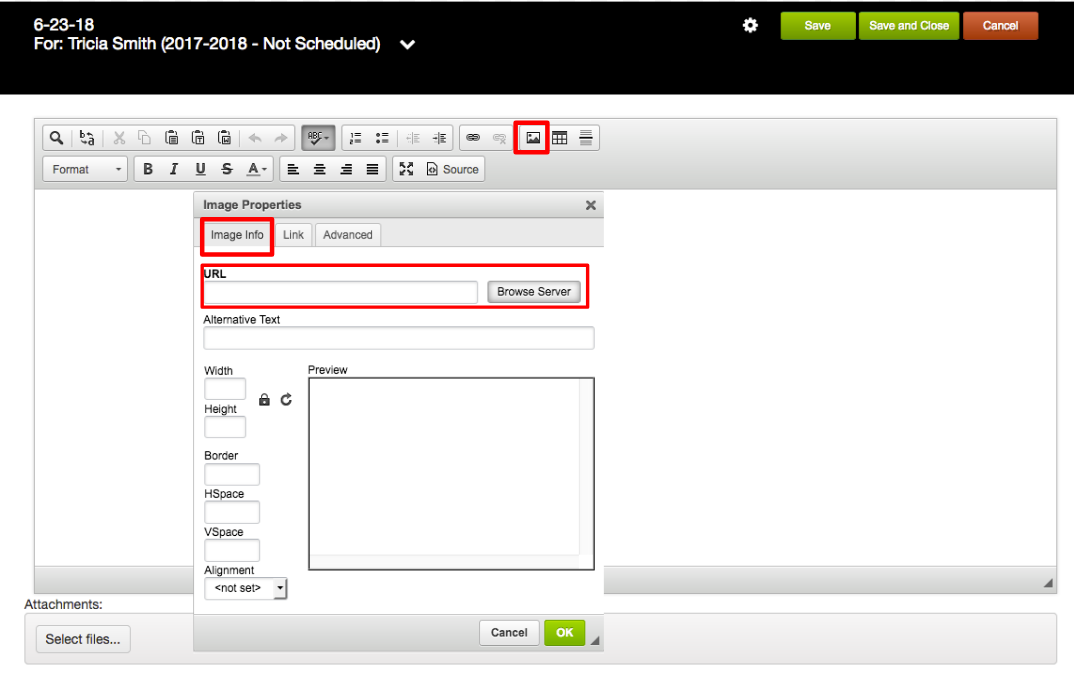
Insert Image: Used to insert a picture (JPEG, PNG, BMP, etc) into the document.
On the “Image Info Tab” Insert a URL
Click Browse Server.
This opens a new window
Note:You must upload your images to the server before inserting them into your document.
You can select an image that you have already uploaded or you can choose to upload a new image from your computer by clicking “Select a file to upload to the server”

If you choose to upload an image to the server a window will open with access to your computers hard drive
Select the image file and click “Open”.
Note: That image has been uploaded is now available in the “Choose an image from the server” section.
This will autofill the URL field and present you with a preview of how the image will look in the Artifact.

Alter the images Properties:
Add Alternative Text as a descriptor.

Edit the Width
Edit the Height
Add A border
Adjust the Horizontal Space and Vertical Space
Set the left and right alignment.
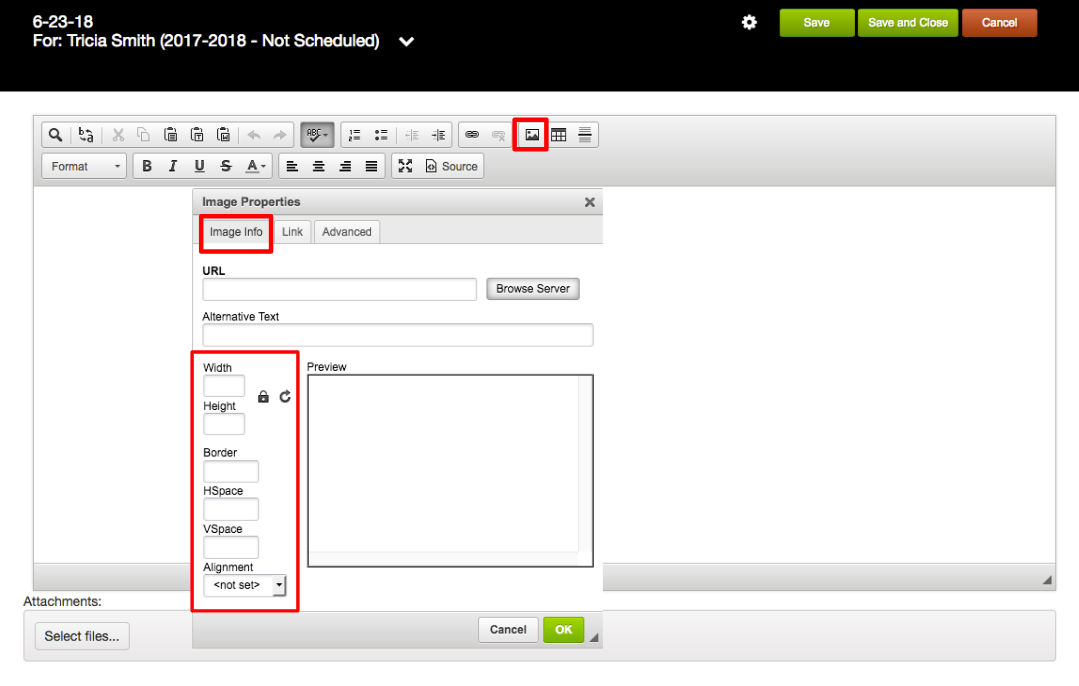
The Link and Advanced tabs are for more advanced image editing and are optional.
After the Properties are set you can click “OK”.
This returns you to the Artifact.
If you need to return to the edit window, right click the image and choose “Image Properties”.
Insert Table: Used to insert a table consisting of columns and rows into the document.
Table Properties:
Rows: Set the number of rows.
Columns: Set the number of Columns.
Width: Set the width of the overall Table.
Height: Set the height of the overall Table.
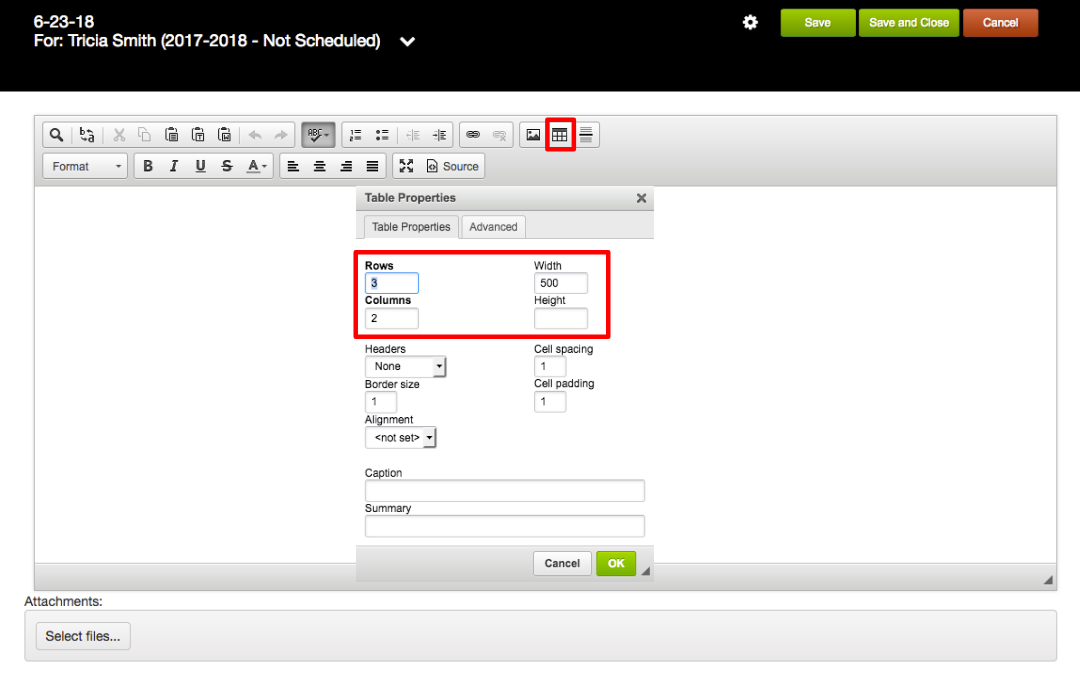
Headers: Set the first cell of the row or column to be used as a header.
Bordersize: Set the size of the border.
Alignment: Set alignment to left, center or right.
Cell spacing: Set cell spacing.
Cell Padding: Set cell padding.

Caption: Insert a caption.
Summery: Insert a summary.

After setting all the Table Properties click “OK”
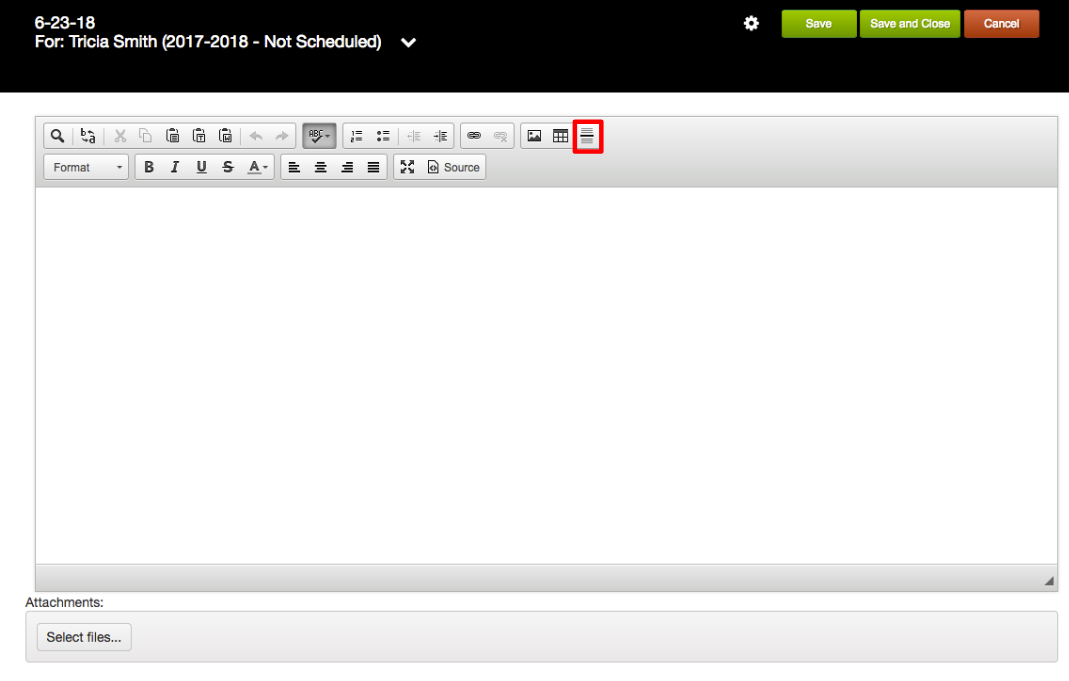
Insert Horizontal Line: Used to insert a horizontal line for separation.
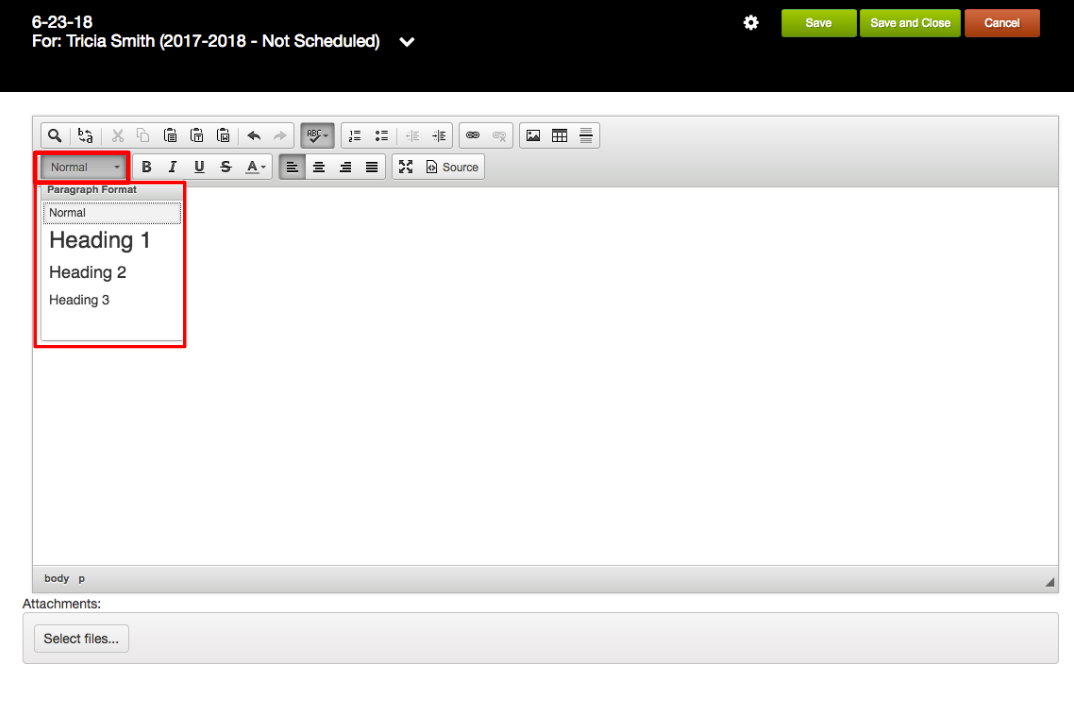
Paragraph Format: Used to add style headings to your document that also adds additional functionality.
Bold: Used to transform regular text to bolded text.
Italics: Used to transform regular text to italicized text.
Underline: Used to underline specific text.
Strikethrough:Used to cross out specific text.
Text Colors: Used to change the text color.
Align Left: Used to align the first letter of each row to a given point at the left side of the page.
Align Center: Used to align the entire row to the center of the page.
Align Right: Used to align the first letter of each row to a given point at the right side of the page.
Justify: Used to align text so that the row has even spaces on both the left and right of the page.

Maximize Screen: Used to expand the text window to fill the entire screen.
View Source Code: Used to view the code necessary to post on the web.

You can also Attach files to the Artifact by clicking “Select Files”.
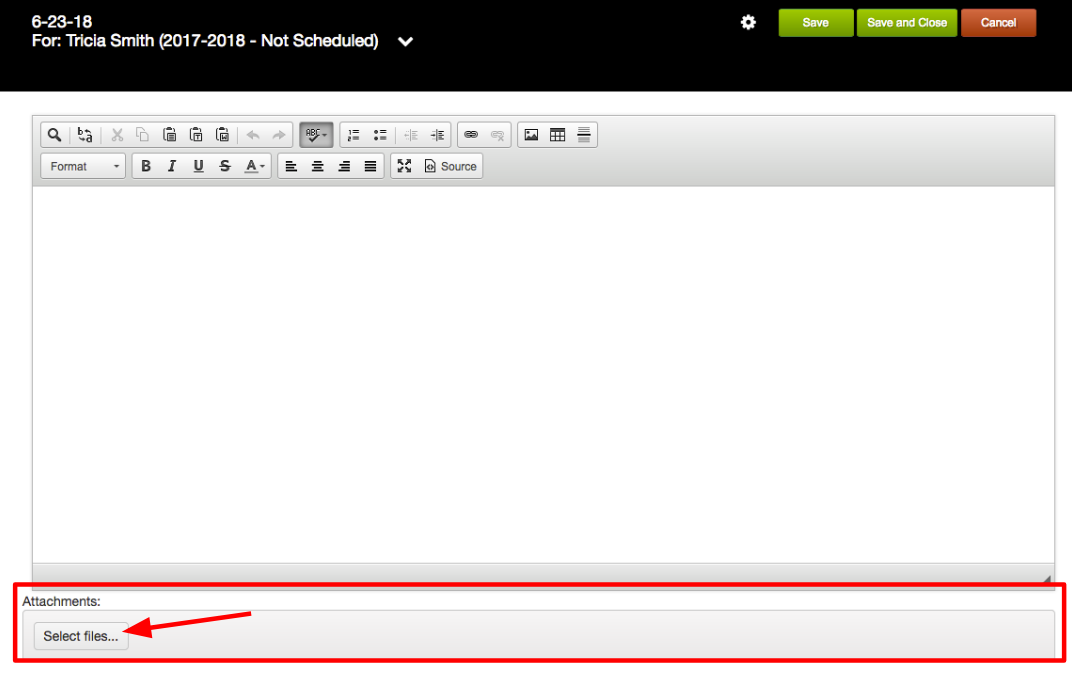
This will open a window accessing your hard drive.
Select the file and click “Open”.
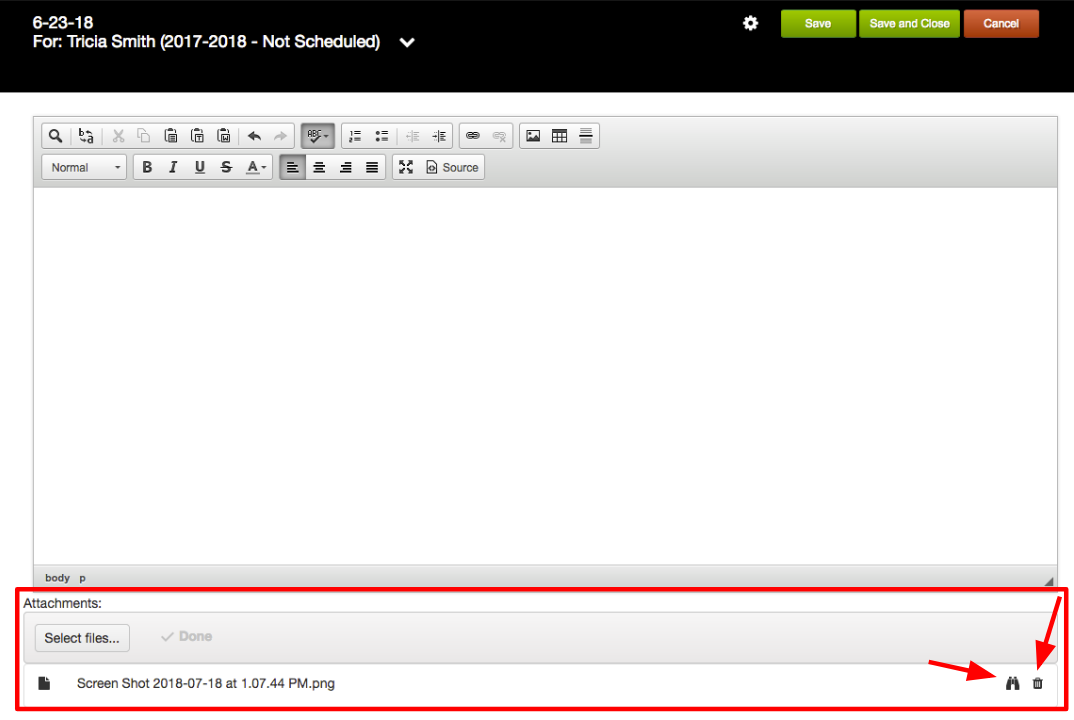
The attachment will be visible in the “Attachment” section and can be opened by clicking the Binocular icon or deleted by clicking the Trash Can icon.
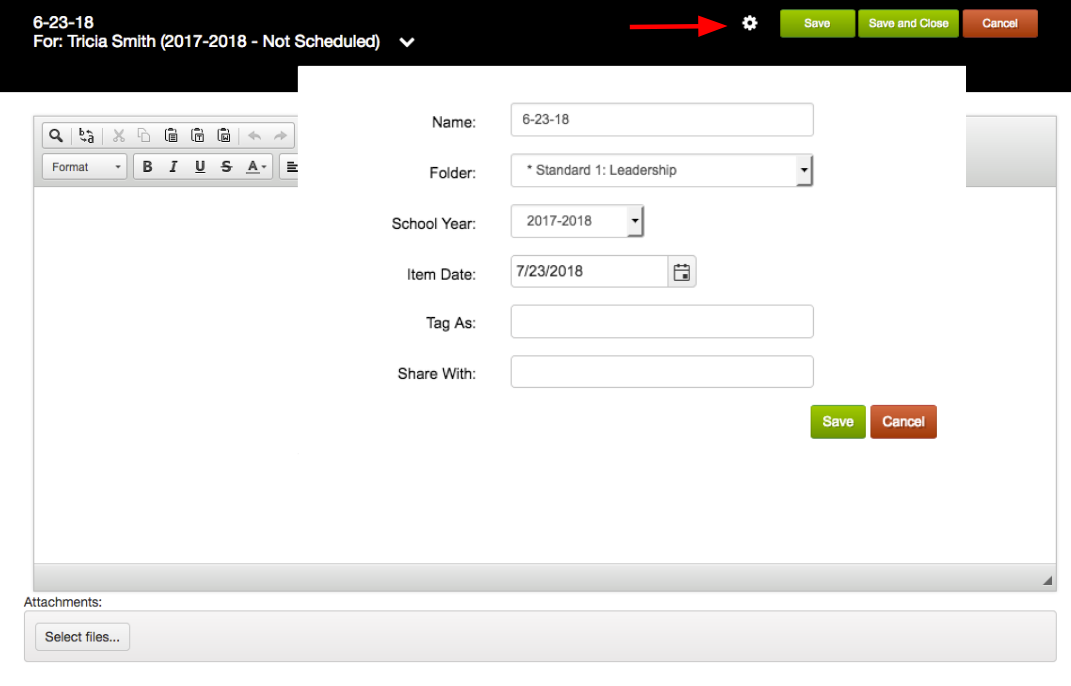
Editing the Artifact’s Properties.
To edit the Properties of the Artifact click the gear/Settings icon.

You can change the following Properties:
Name: Edit the Artifacts name.
Folder: Change the folder that the Artifact is kept.
School Year: Change the year of the Artifact.
Item Date: Change the date of the Artifact.
Tag As: Tag the Artifact with a specific domain.
Share With: Share the artifact with a colleague or a supervisor.
When done click “Save”.
When the Artifact is complete mark it Complete and Share.
Click “Save and Close”.

Related Articles
Managing Portfolio Documents
Click here for Video Follow the step by step document below. Login to Teacher Vitae Click “My Portfolio” “My Portfolio” has two sections “My Folders” and “General”/Artifacts The “My Foldeers” Pane Folders can be added by clicking “+Add Folder” and ...4_Teacher Vitae Training - Professional Portfolio
This 7 minute training video discusses in detail My Portfolio in Teacher Vitae. the video covers accessing My Portfolio and its layout. The difference between Folder View and Tag View. How to add, edit, delete Artifacts and their settings. ...Building a Professional Portfolio in Teacher Vitae
This webinar will guide you through the process of creating and building your professional portfolio in Teacher Vitae. Admin Edit Button
Admin Edit Button On the Manage Form page of your Teacher Vitae site you will notice that some Forms have an Edit button in the Action column and some don’t. Due to data being lost when a form is edited after being published, we have added some ...Professional Portfolio Overview
The Professional Portfolio in Teacher Vitae (aka "My Portfolio") helps educators capture personal success and reflection on practice, enabling meaningful conversations around the teaching process. Portfolio features include: Allows the user to ...